Give your friends €10 off their first order!
Refer a FRIEND


WHAT YOU WILL NEED:
White card blank 6 1/2" square
Black cardstock
Vellum
Just Because Lamination A5 Stamp
Fractured Flora 5 x 5" Painted Mounts
All Surfaces Shades Of Pink 8 x 8" Paper Pad
SBM Hybrid Ink Pad: Midnight
WOW Embossing Ink Pad
WOW Heat tool
WOW White embossing powder
Anti-static bag
Eureka 101 Watercolour Tablet
SBM A3 Magnetic glass mat
Paper Trimmer
Glue
Double-sided tape
Foam pads
Die Cutting machine
[click image to enlarge] 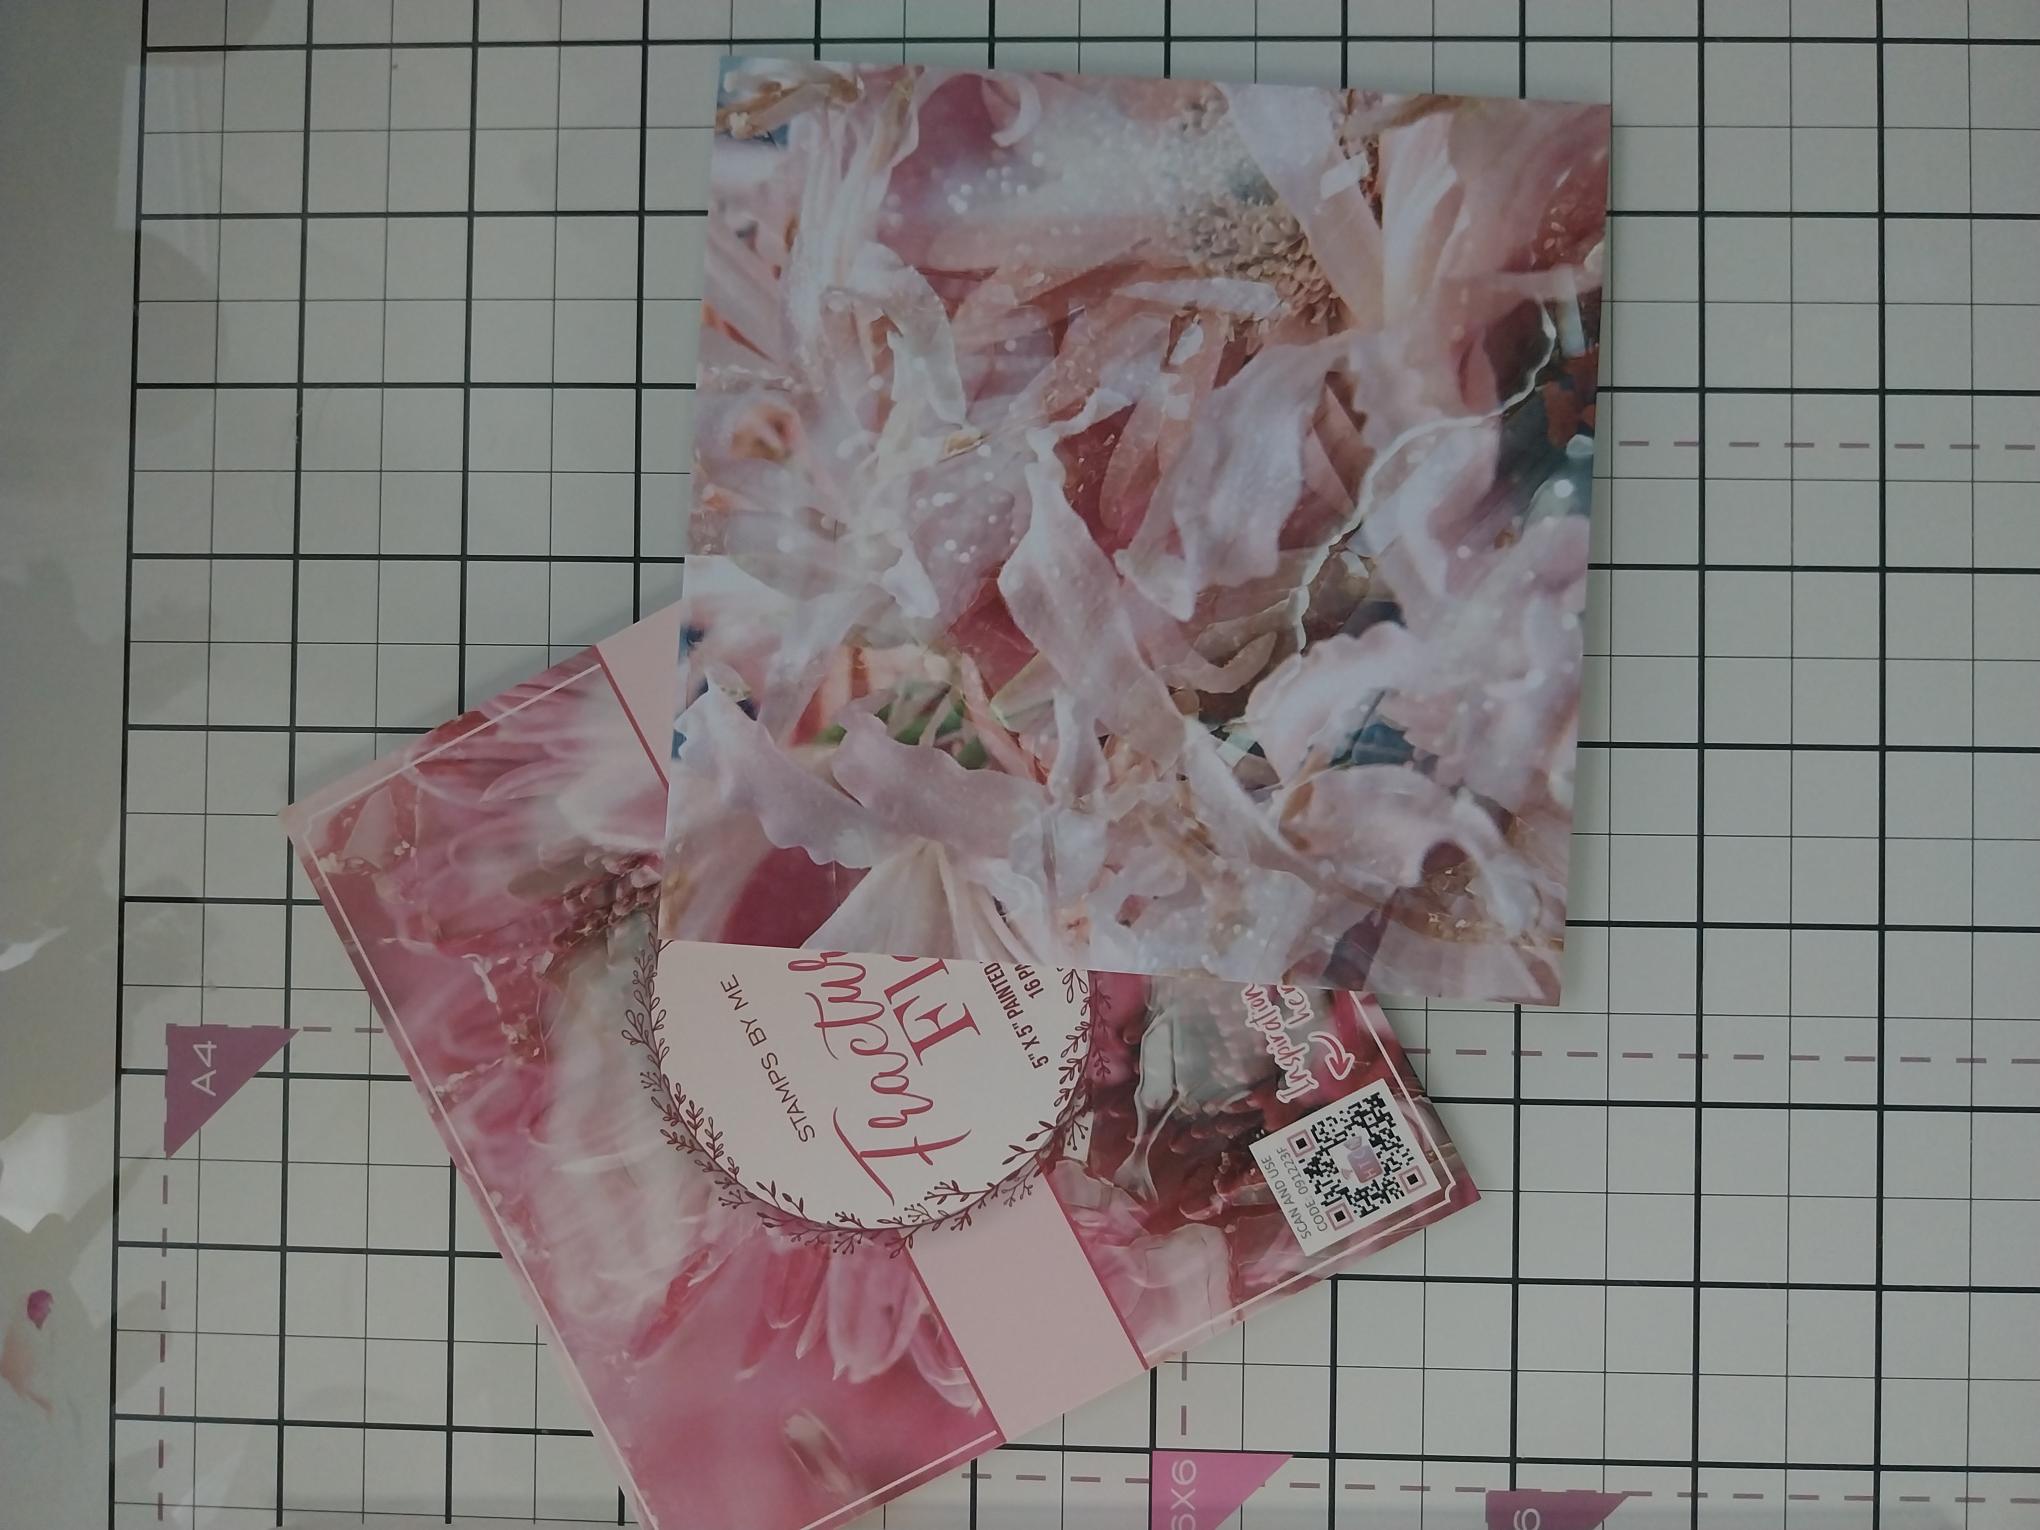
|
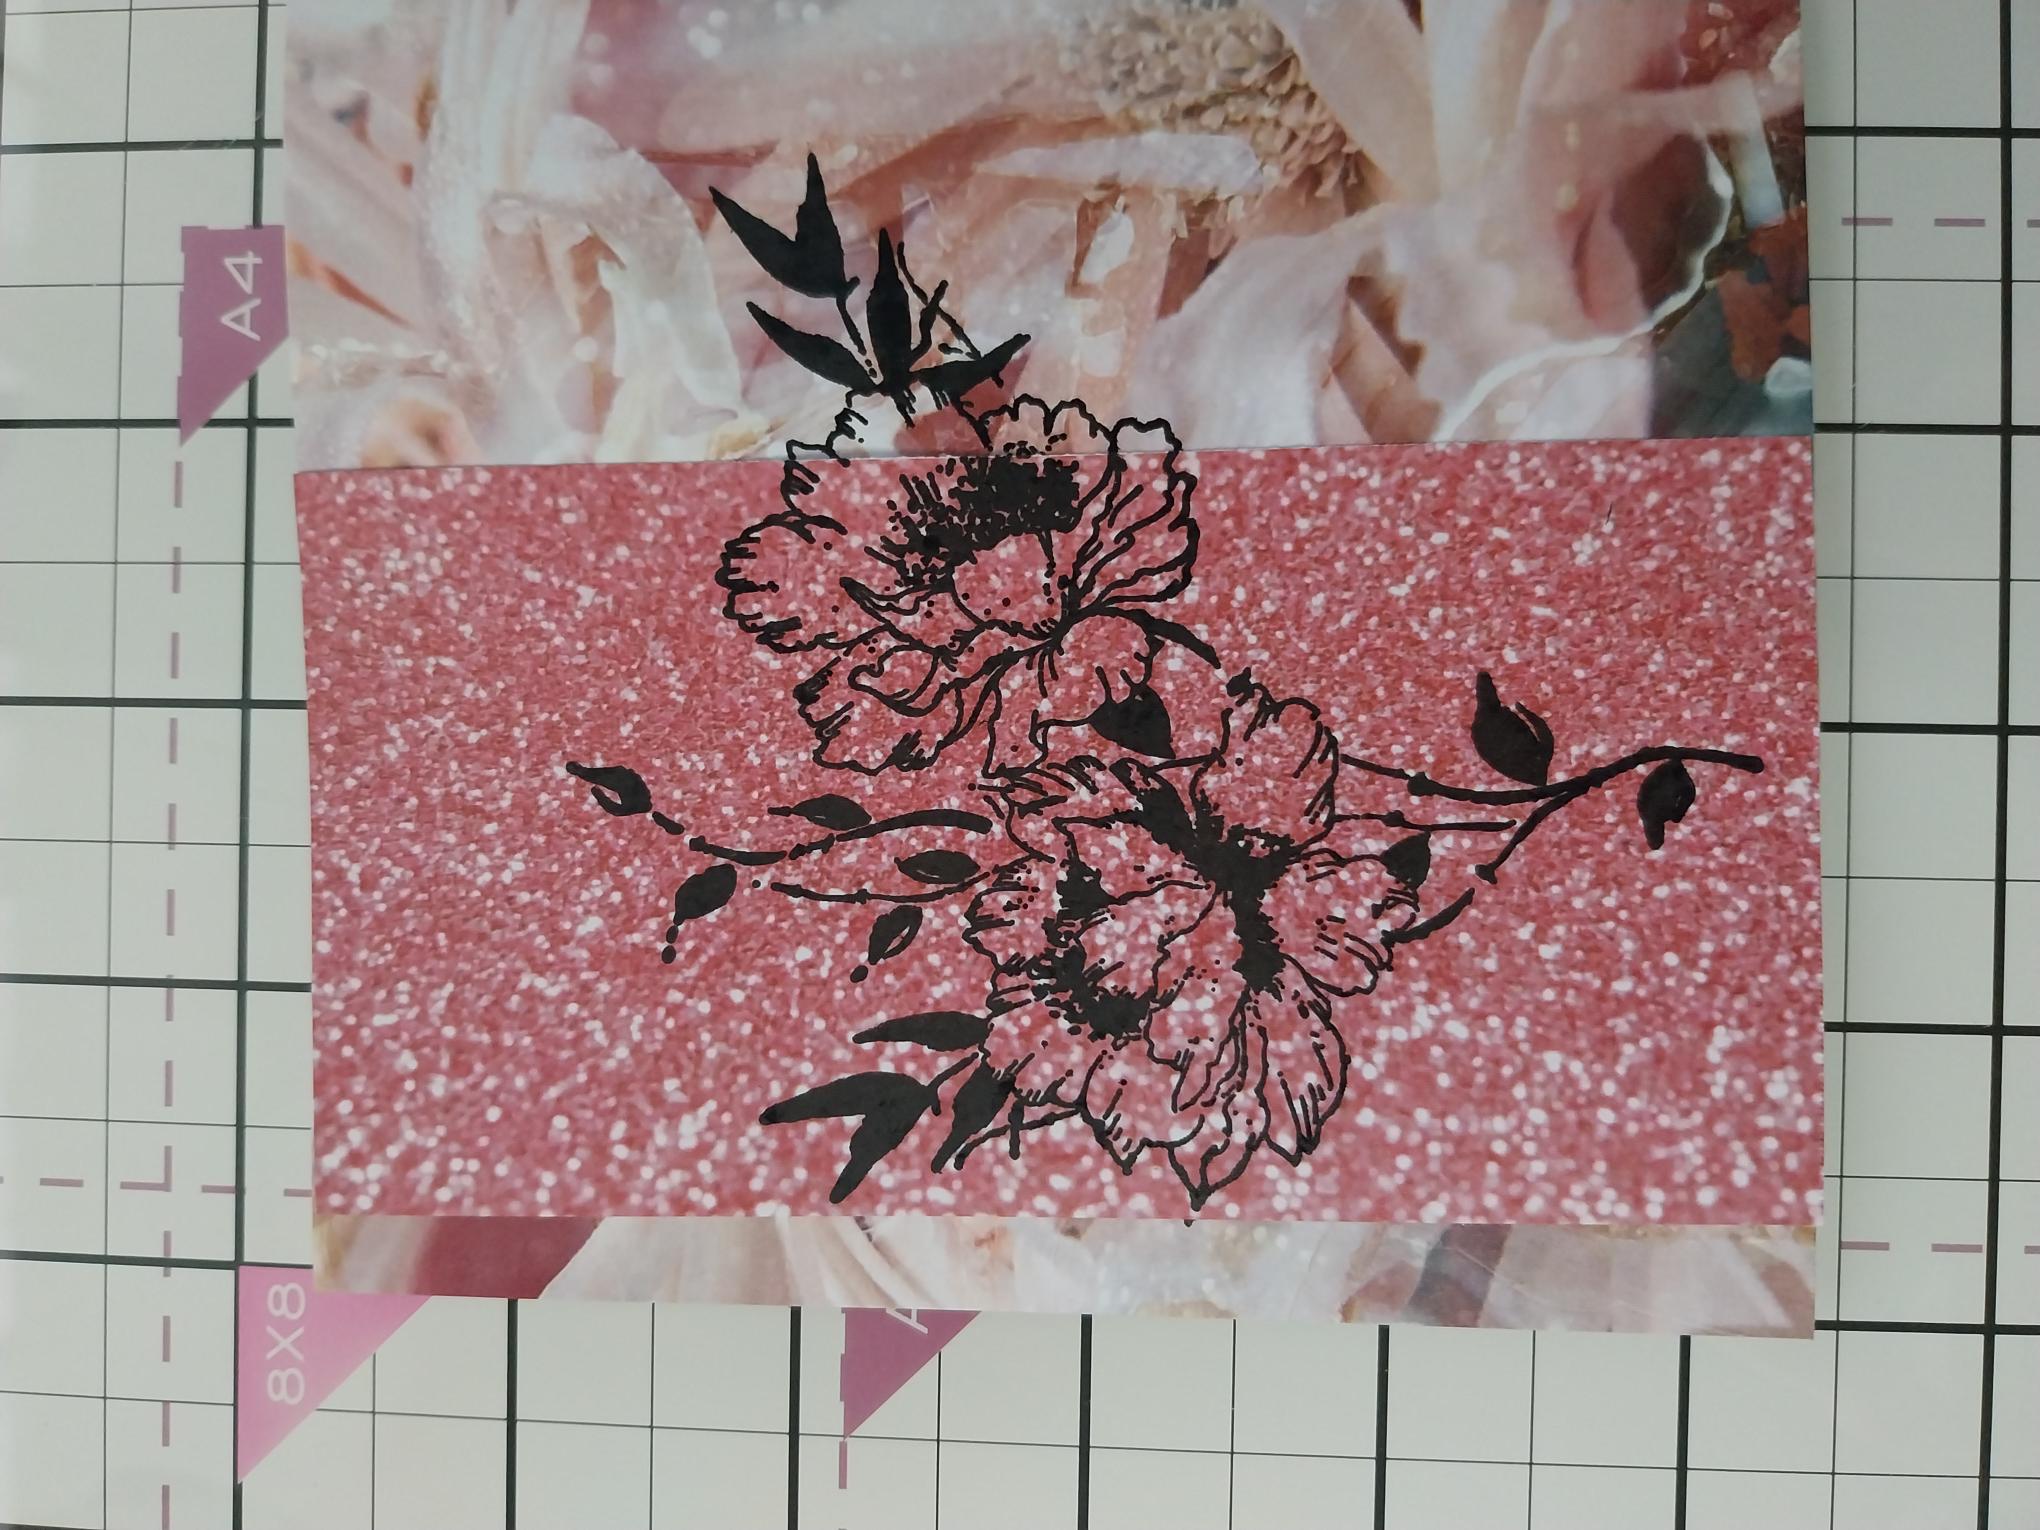
Choose your painted mount design, from the Fractured Flora pack. |
|
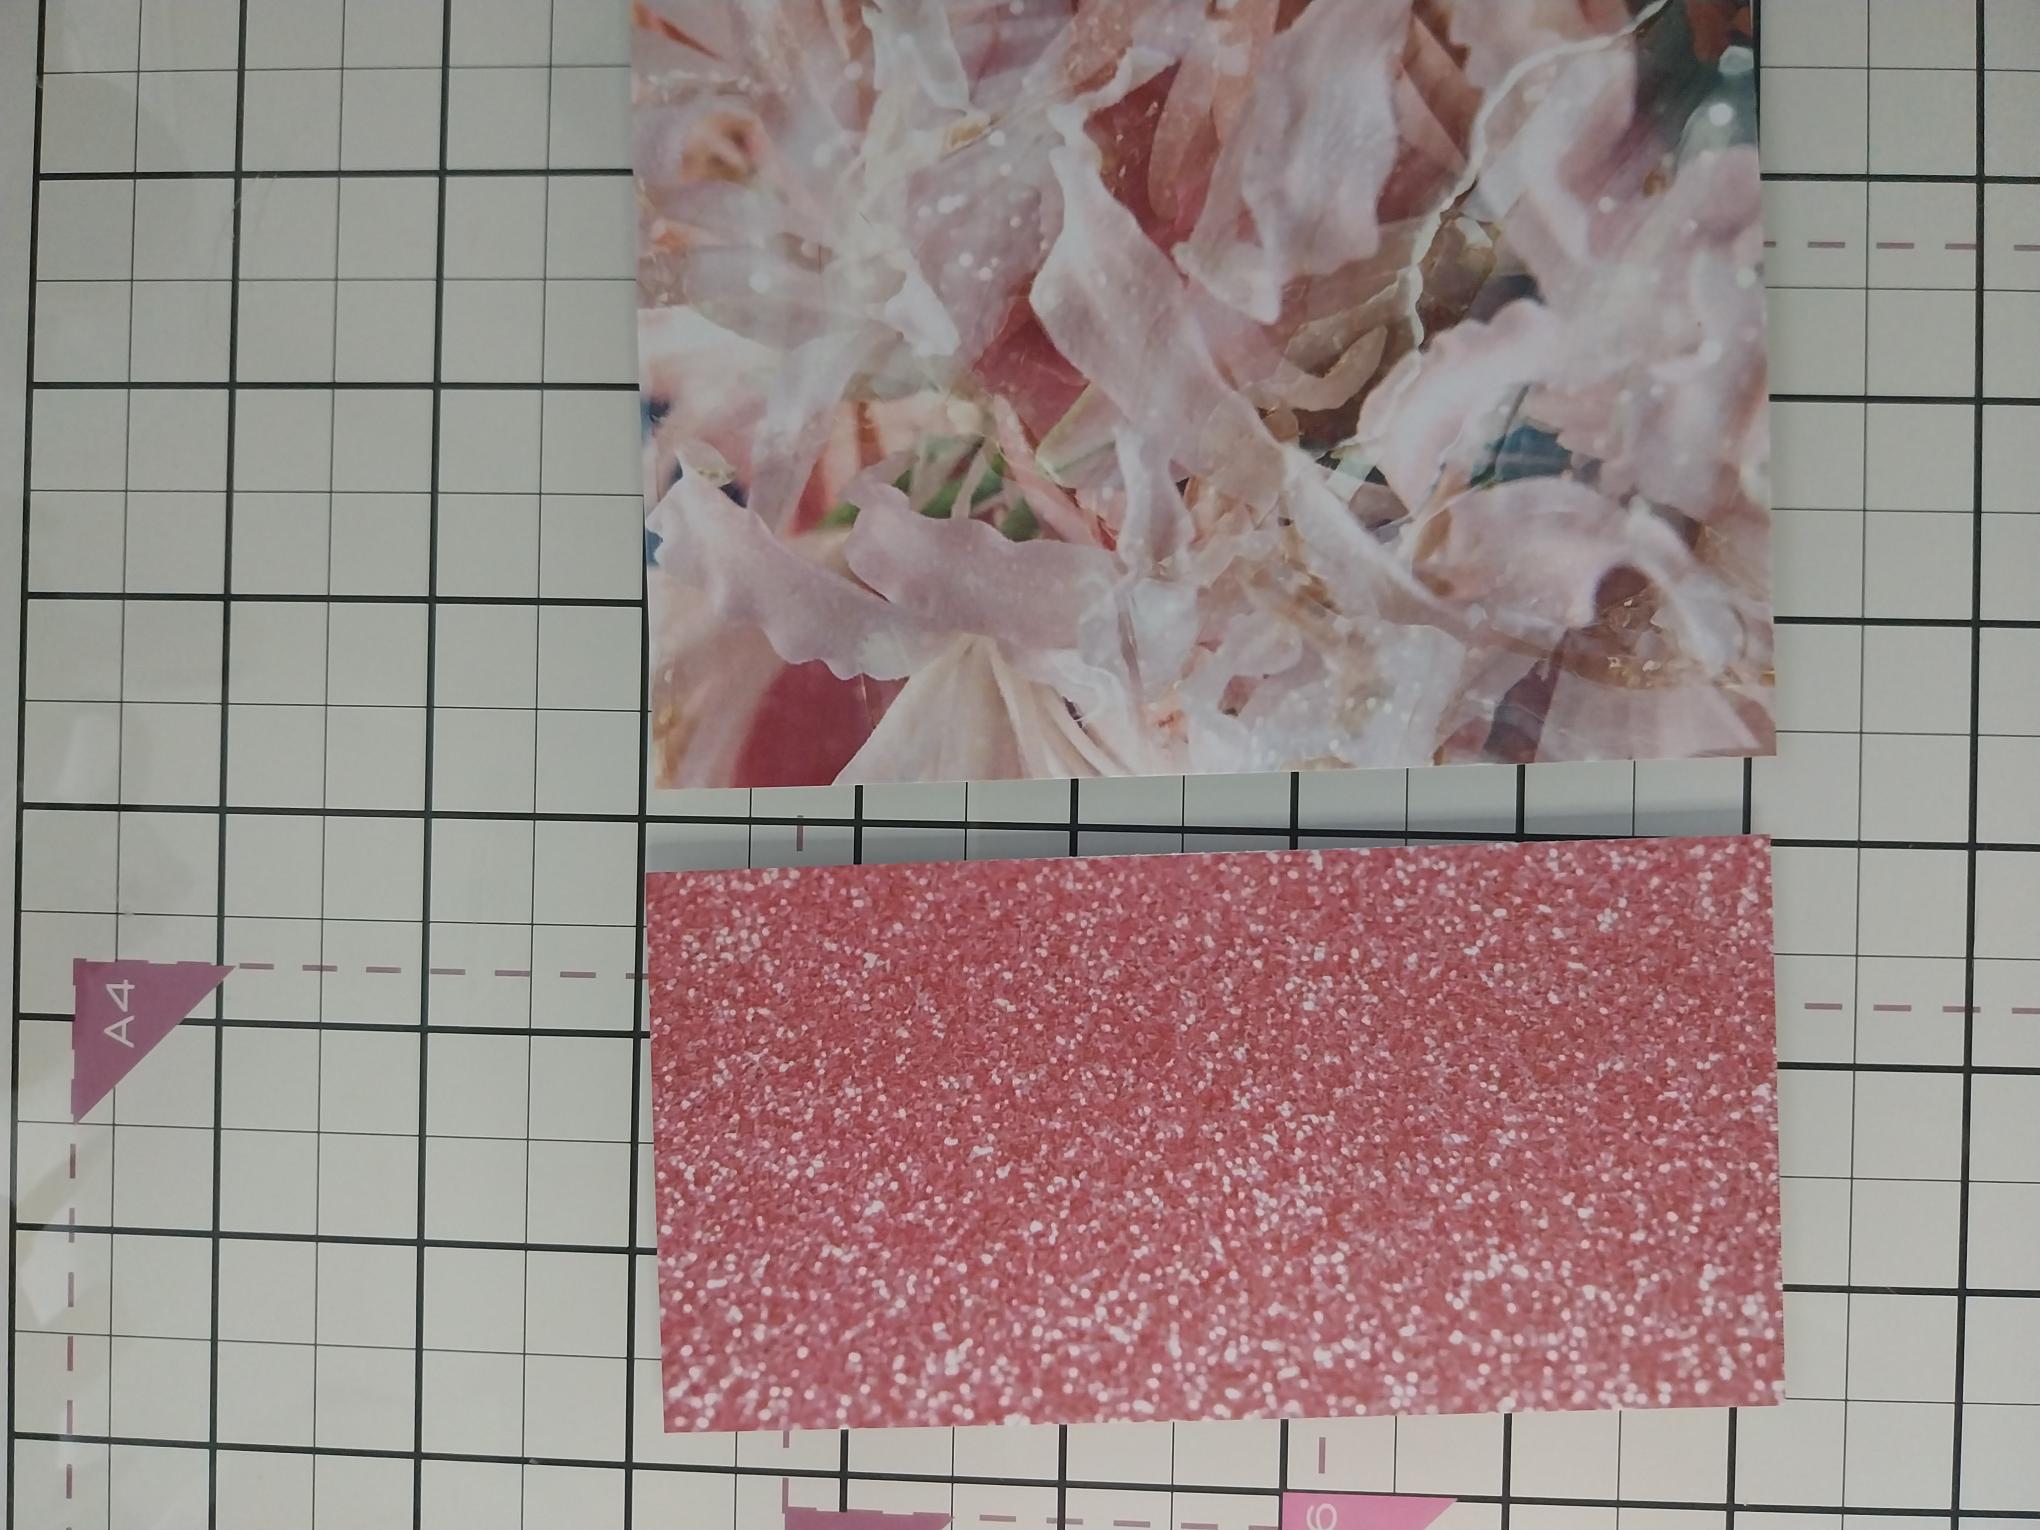
Cut a panel of coordinating paper from the Shades of Pink pack, so it's slightly narrower than the full floral image you will be stamping and trimmed to 5" in length. |
|
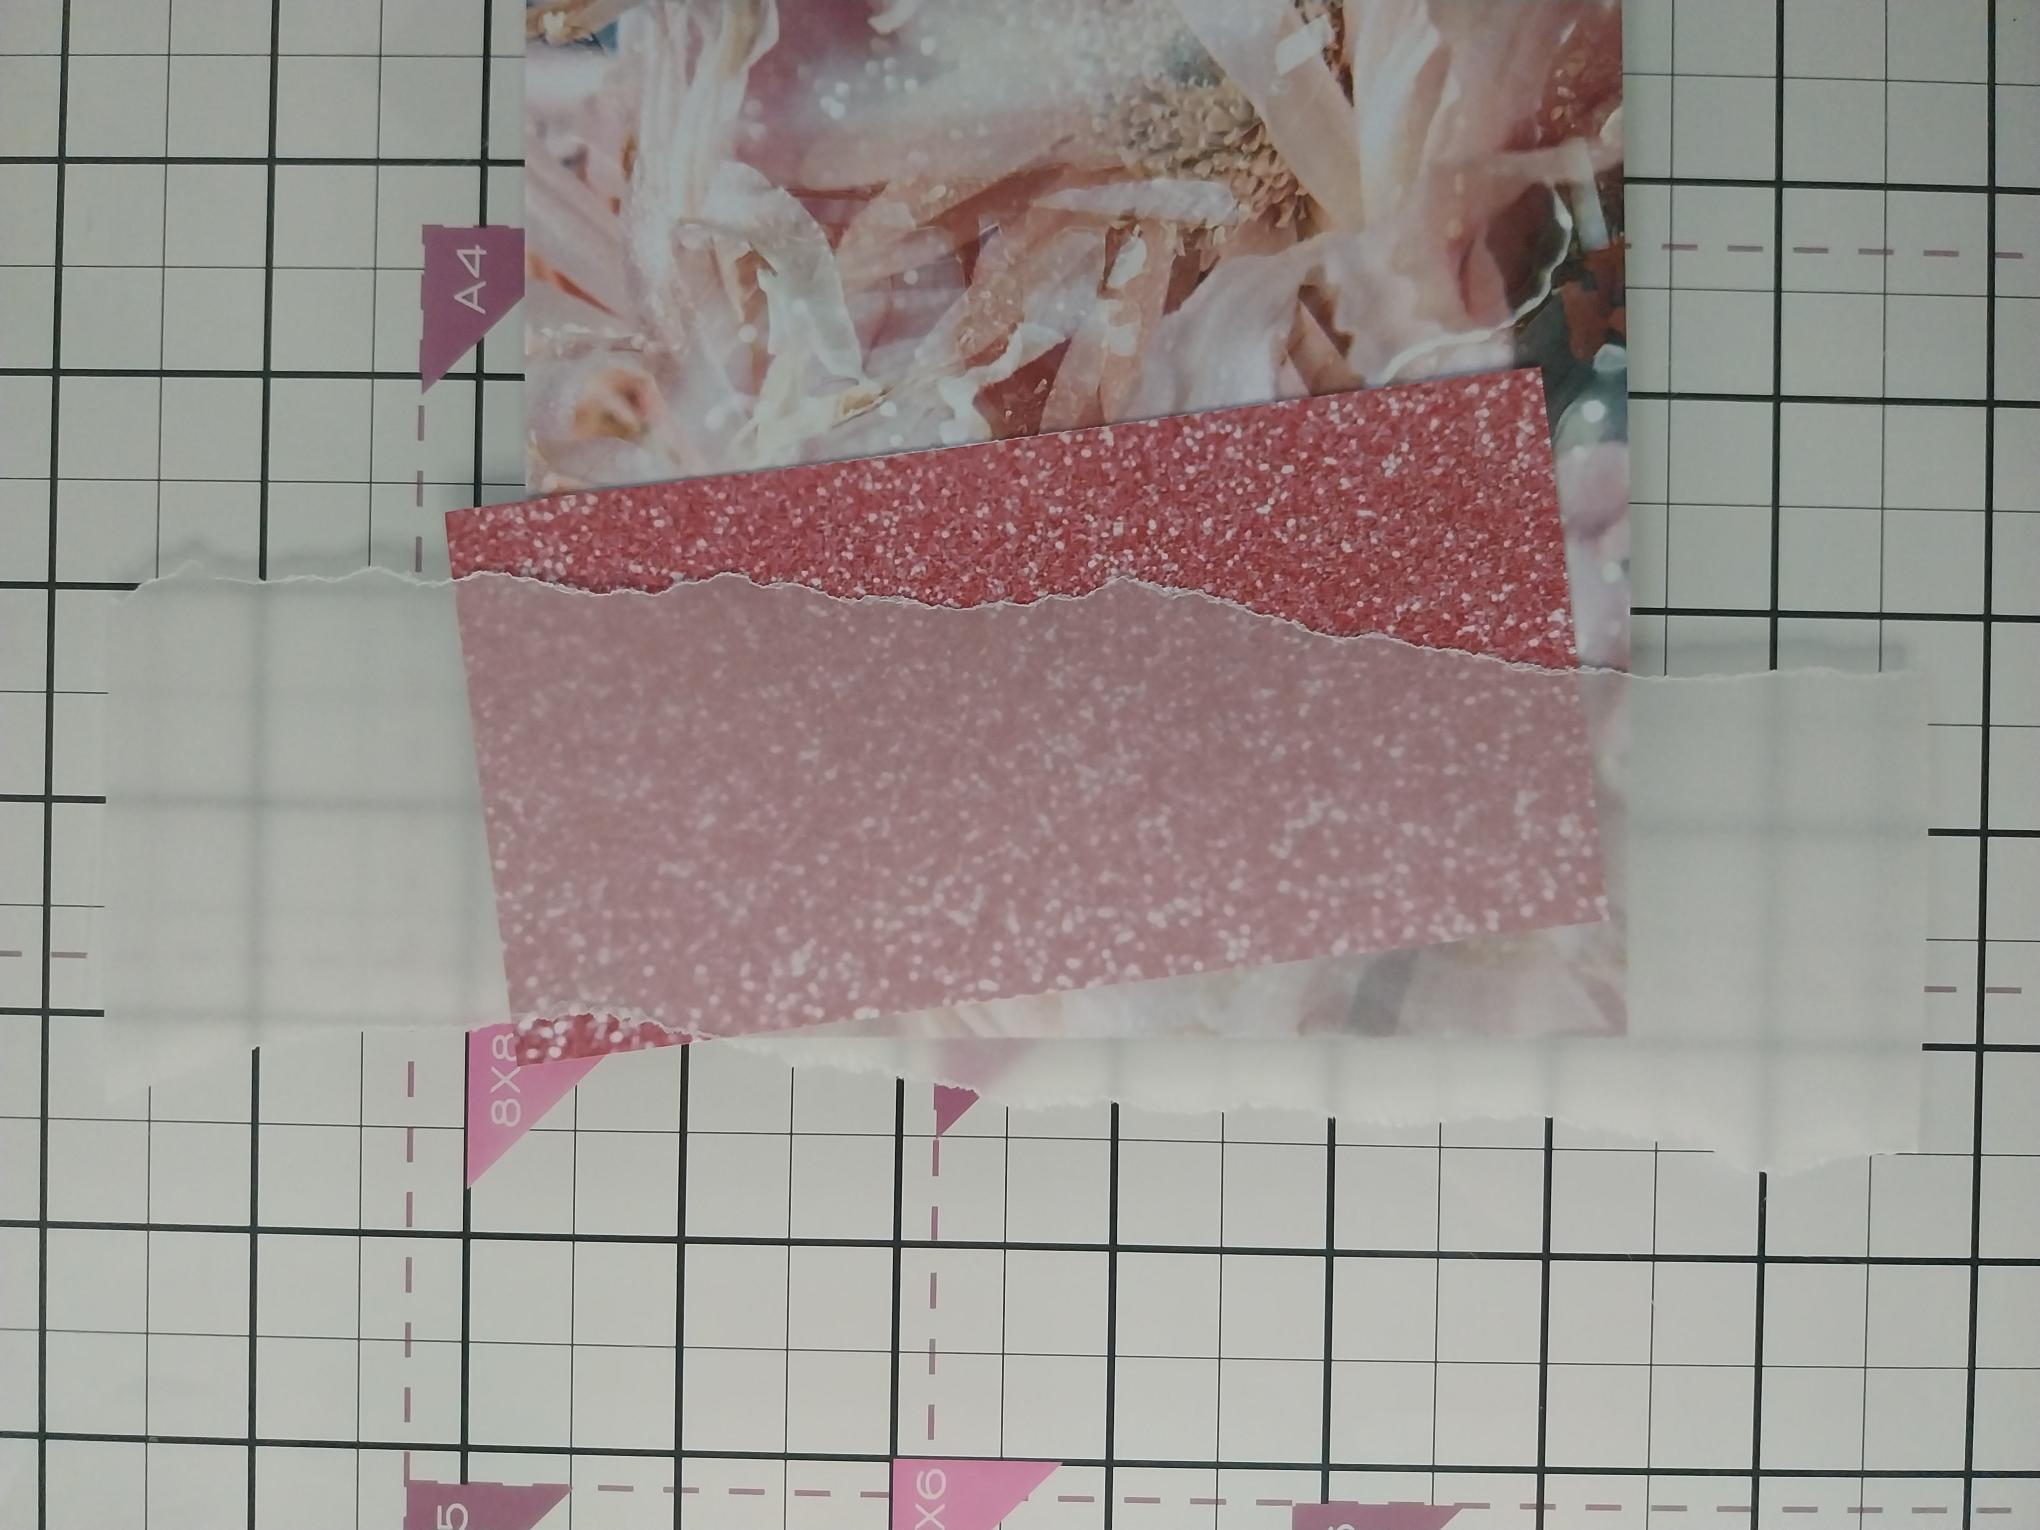
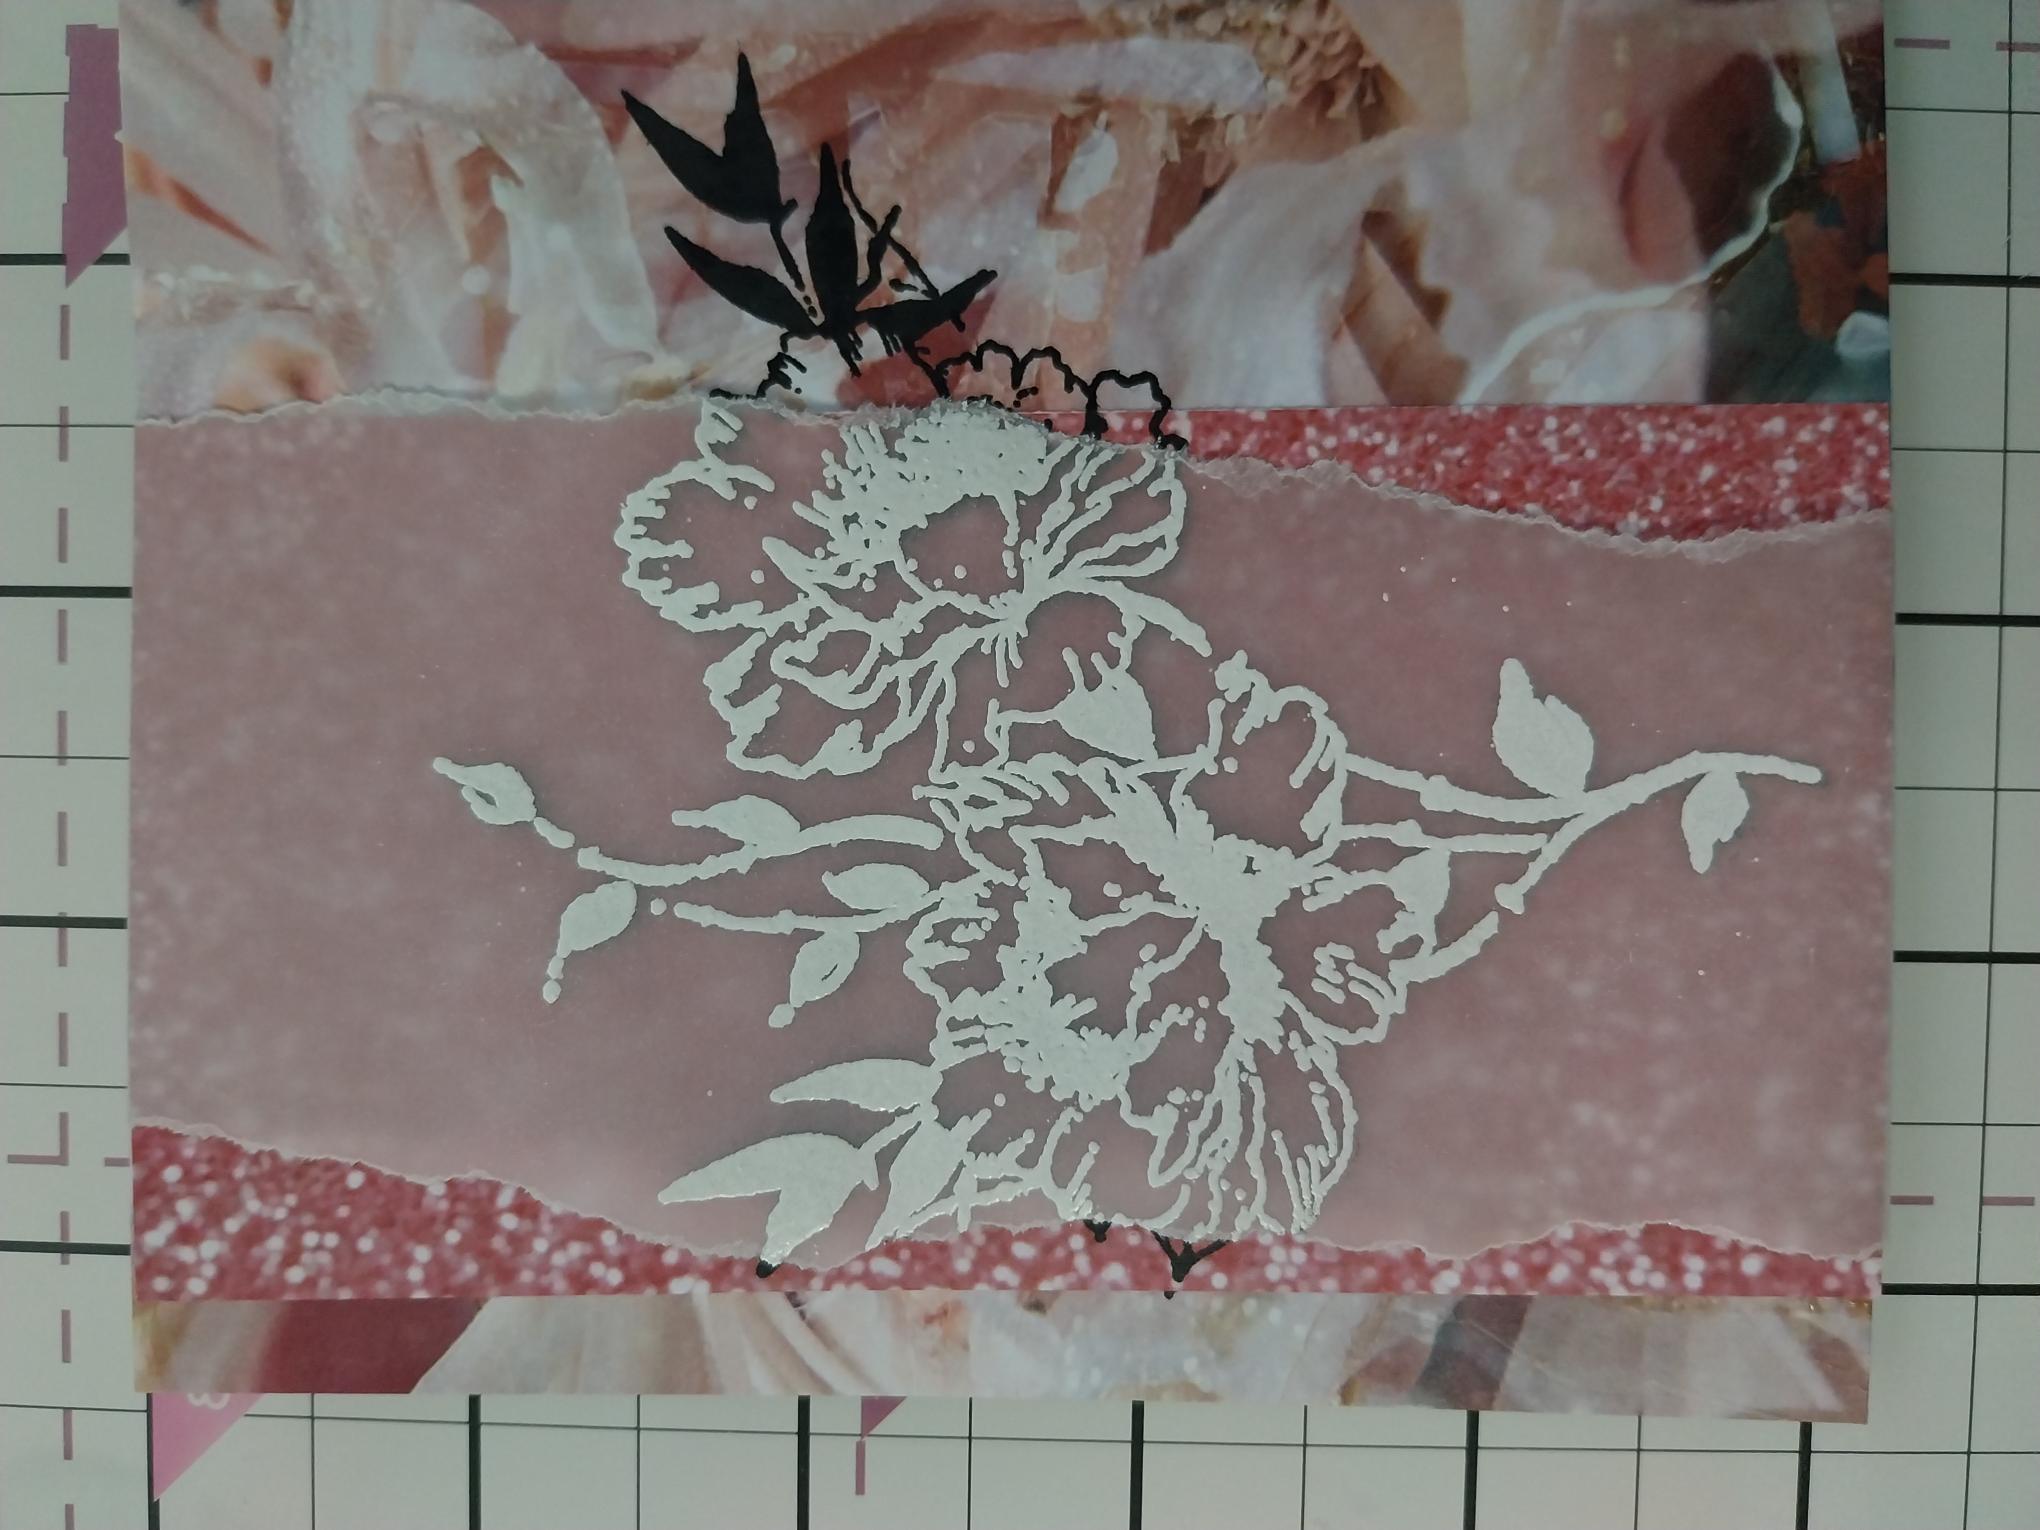
Tear a panel of vellum slightly narrower than the paper panel but longer top and bottom, as seen here. |
|
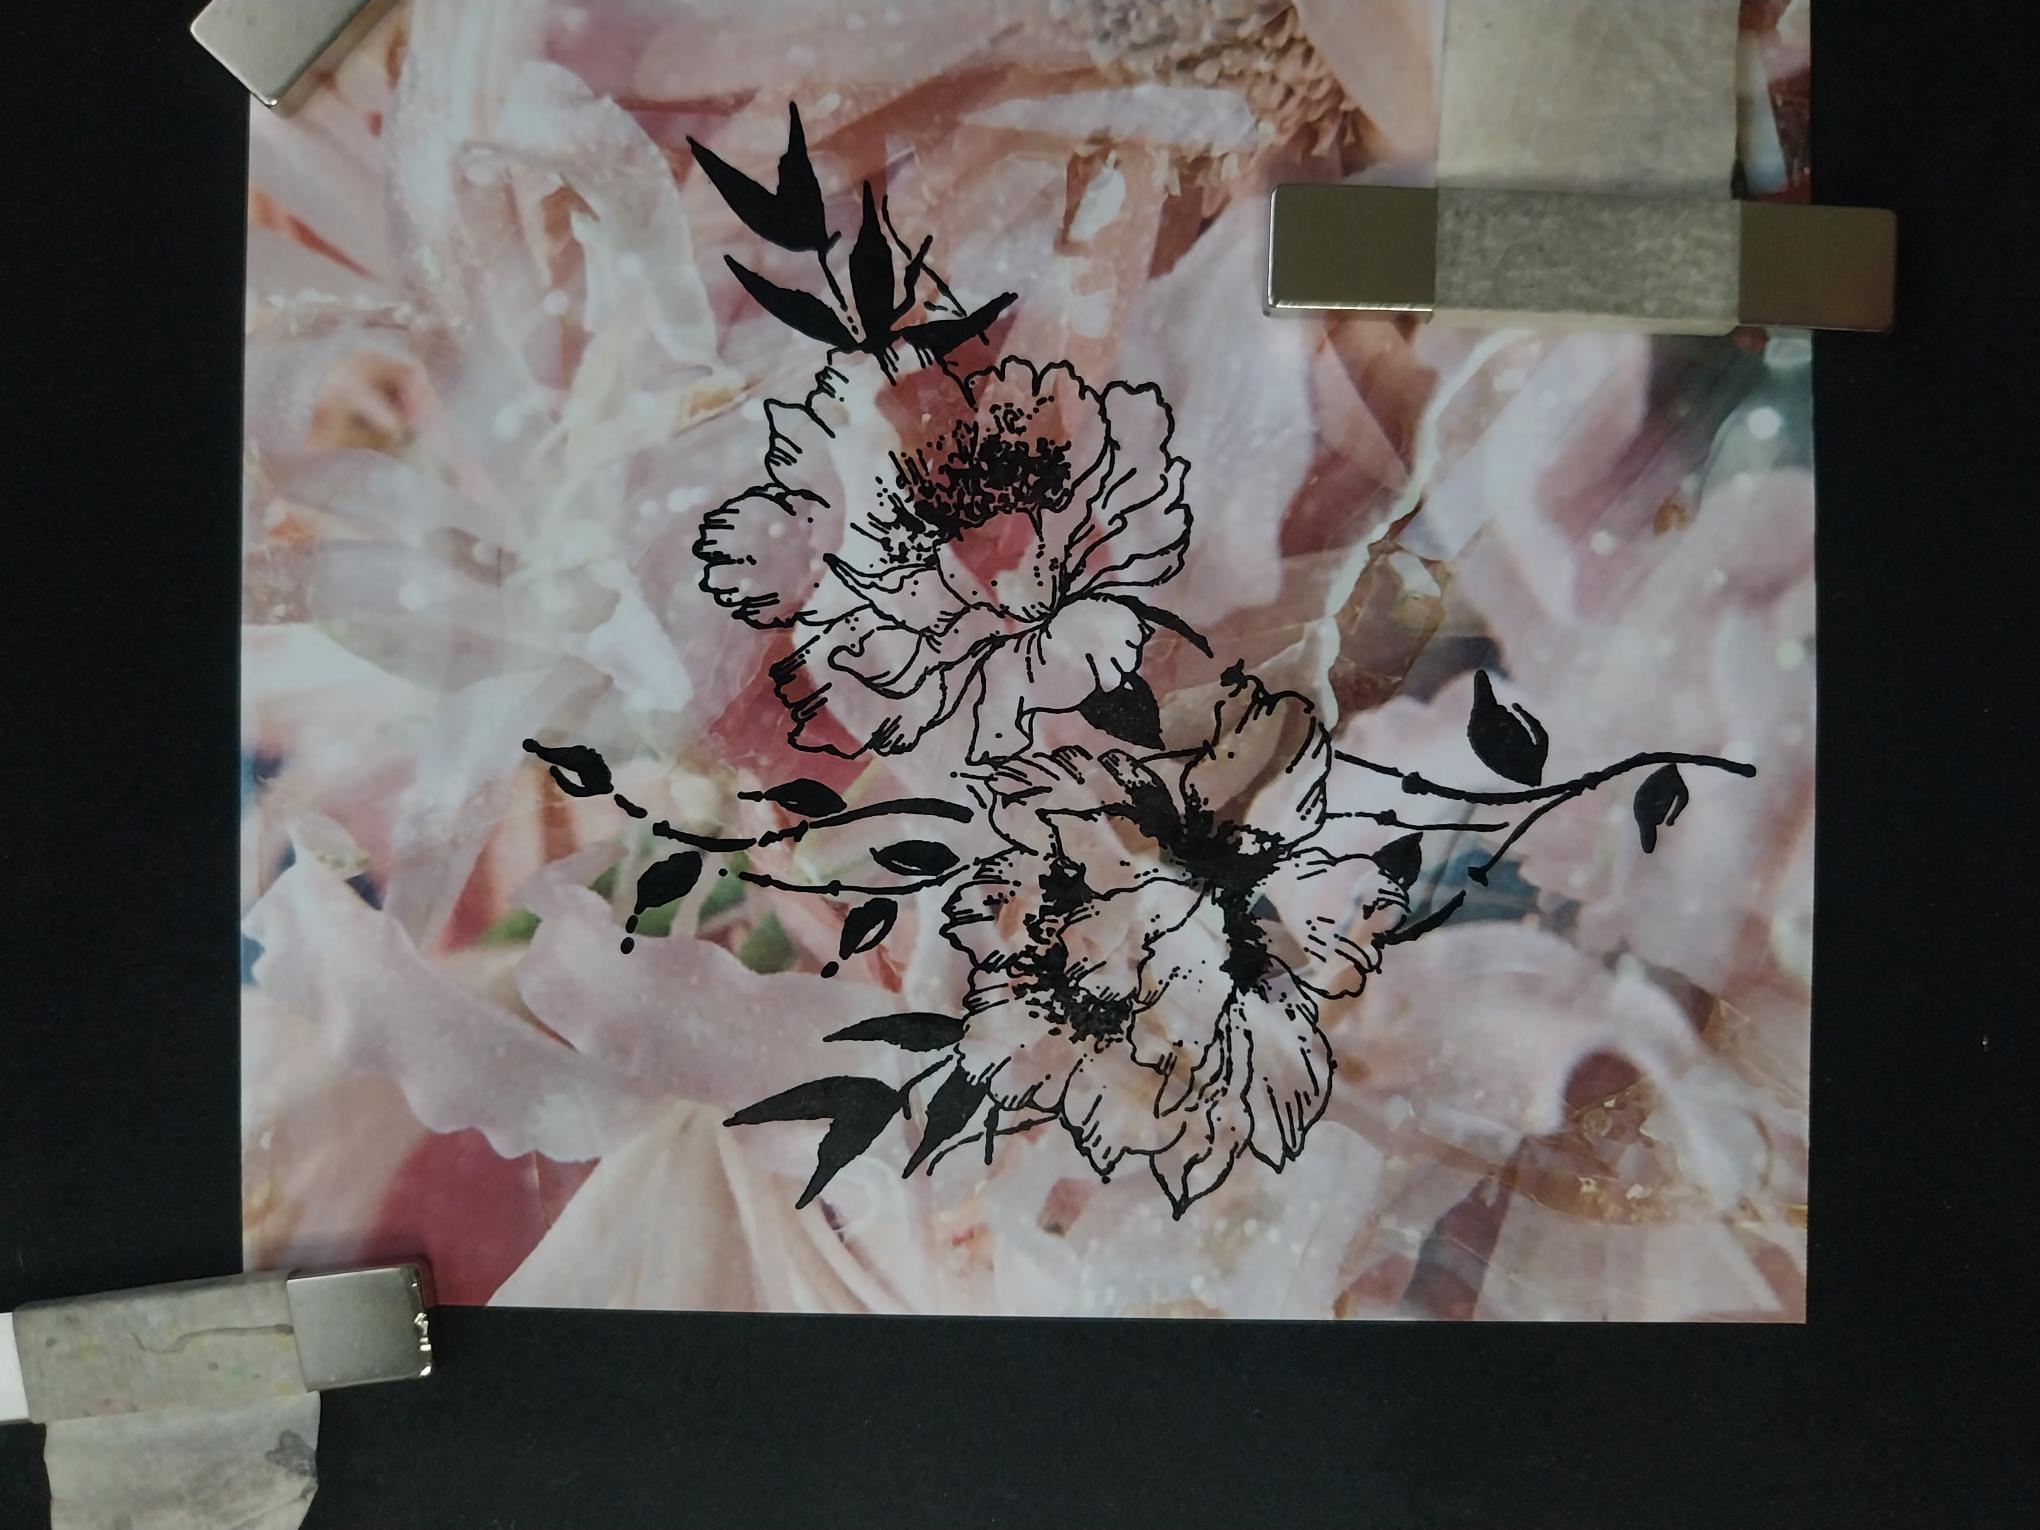
Stamp the full floral image in Midnight, slightly to the left of the Fractured Flora mount. |
|
Stamp the floral design onto the paper panel, deciding where you want your panel to be positioned on the painted mount. I wanted a small strip of the painted mount visible down the left side. The idea is to only have part of the full floral design on the panel.
|
|
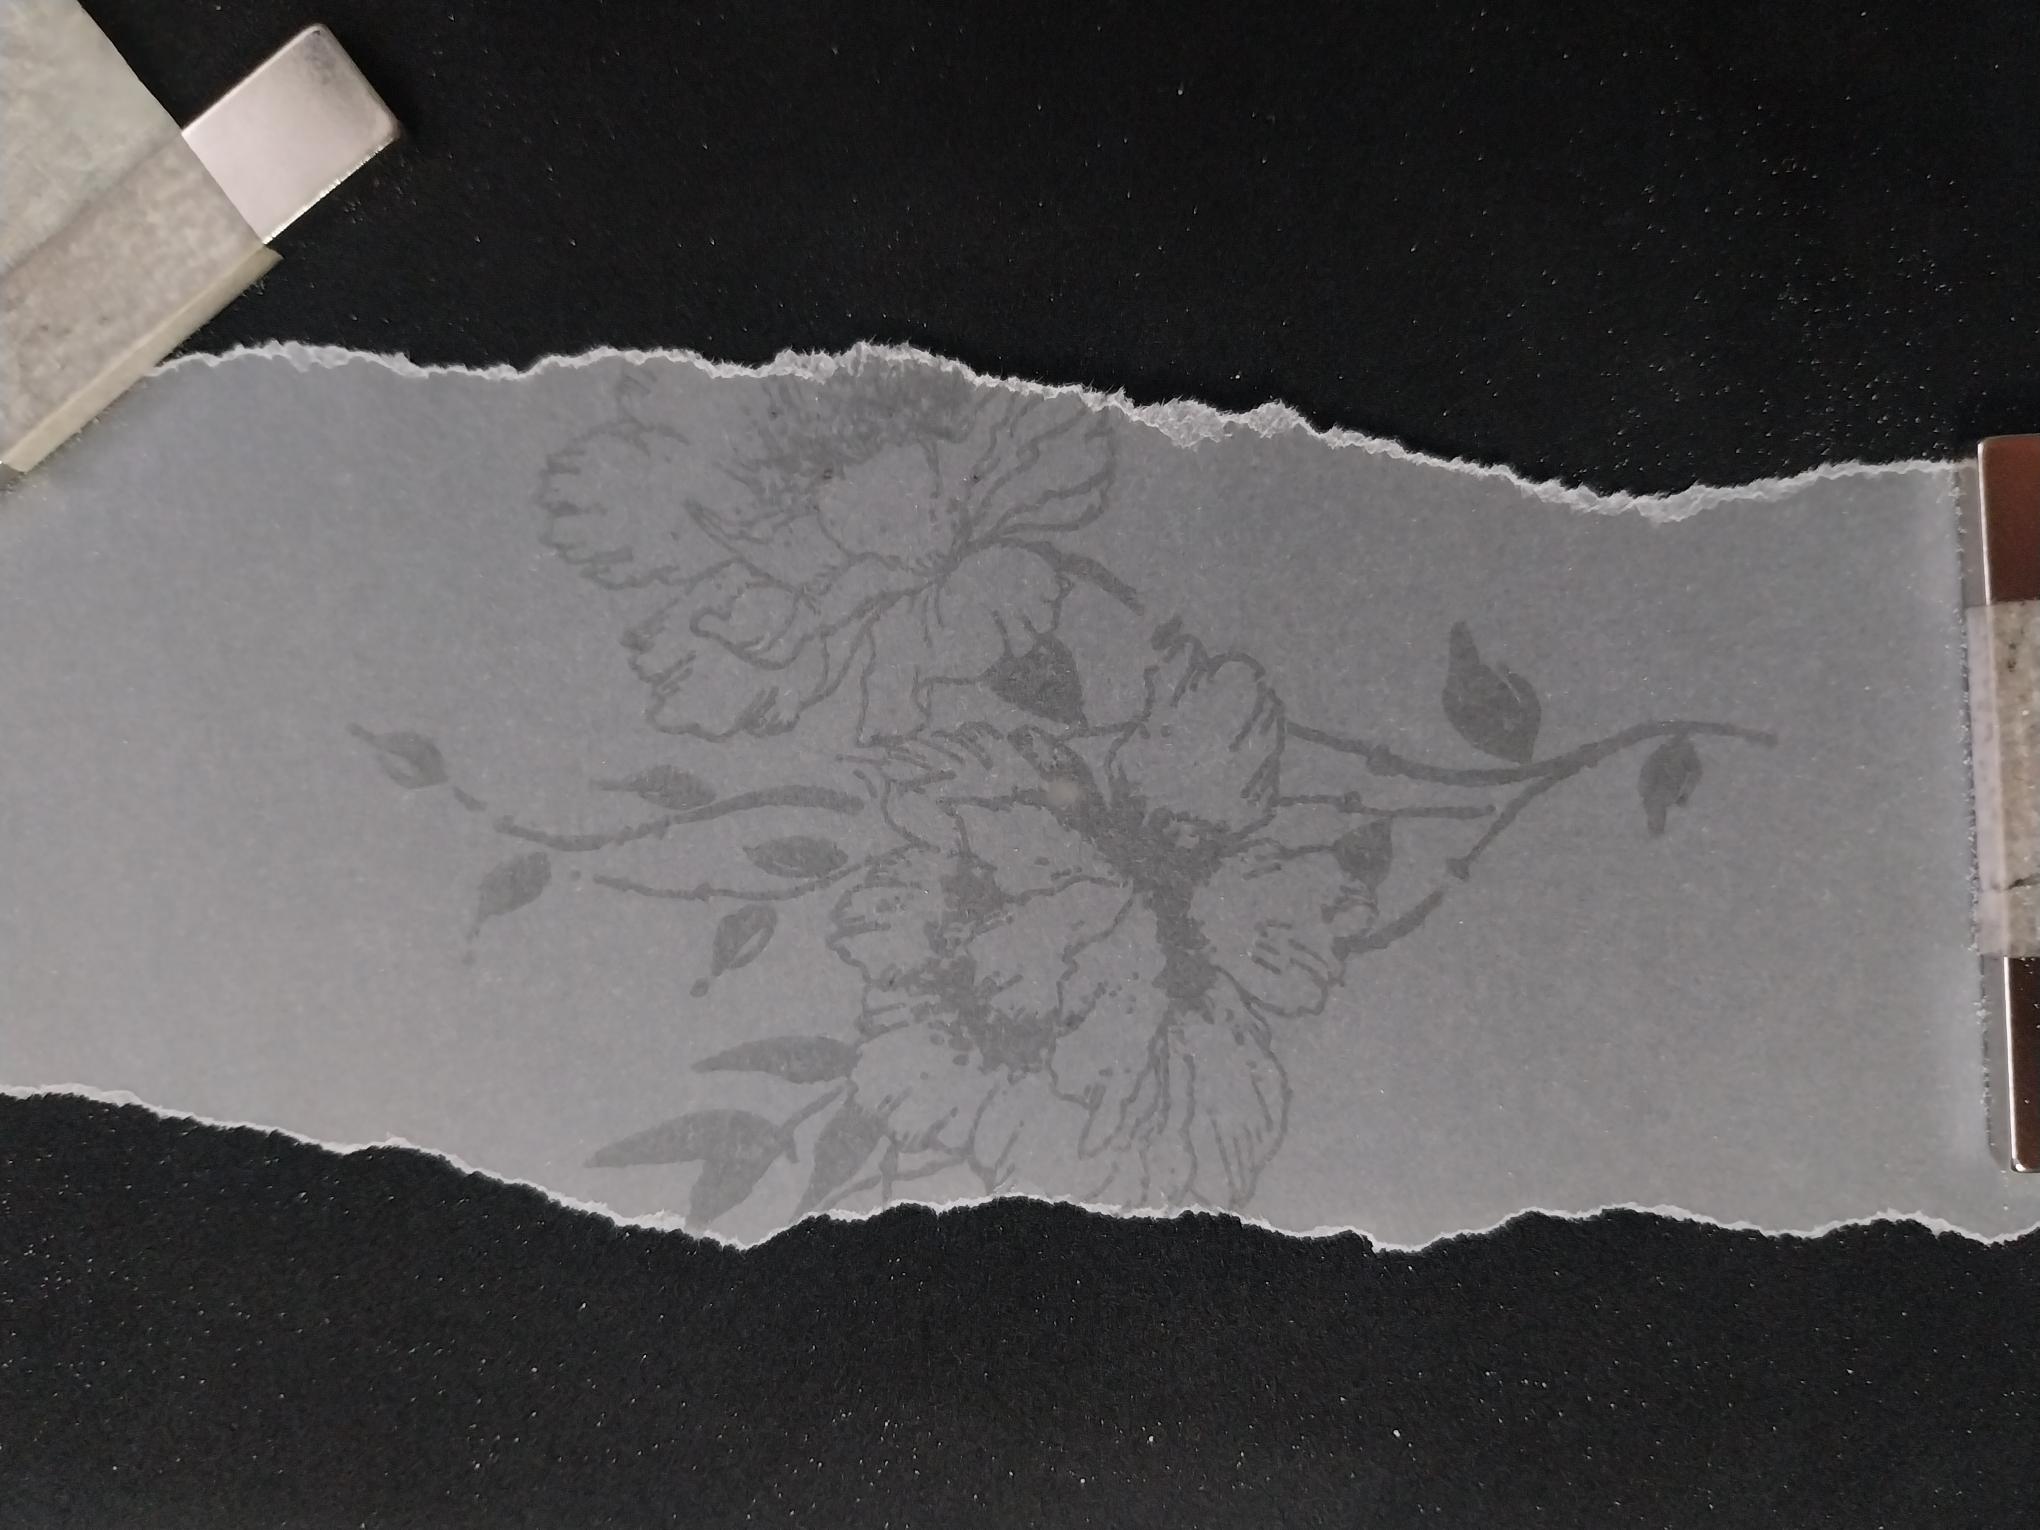
Using the stamped panel as a positional guide, wipe the torn vellum panel with your anti-static bag before stamping the floral image with the WOW sticky embossing powder. |
|
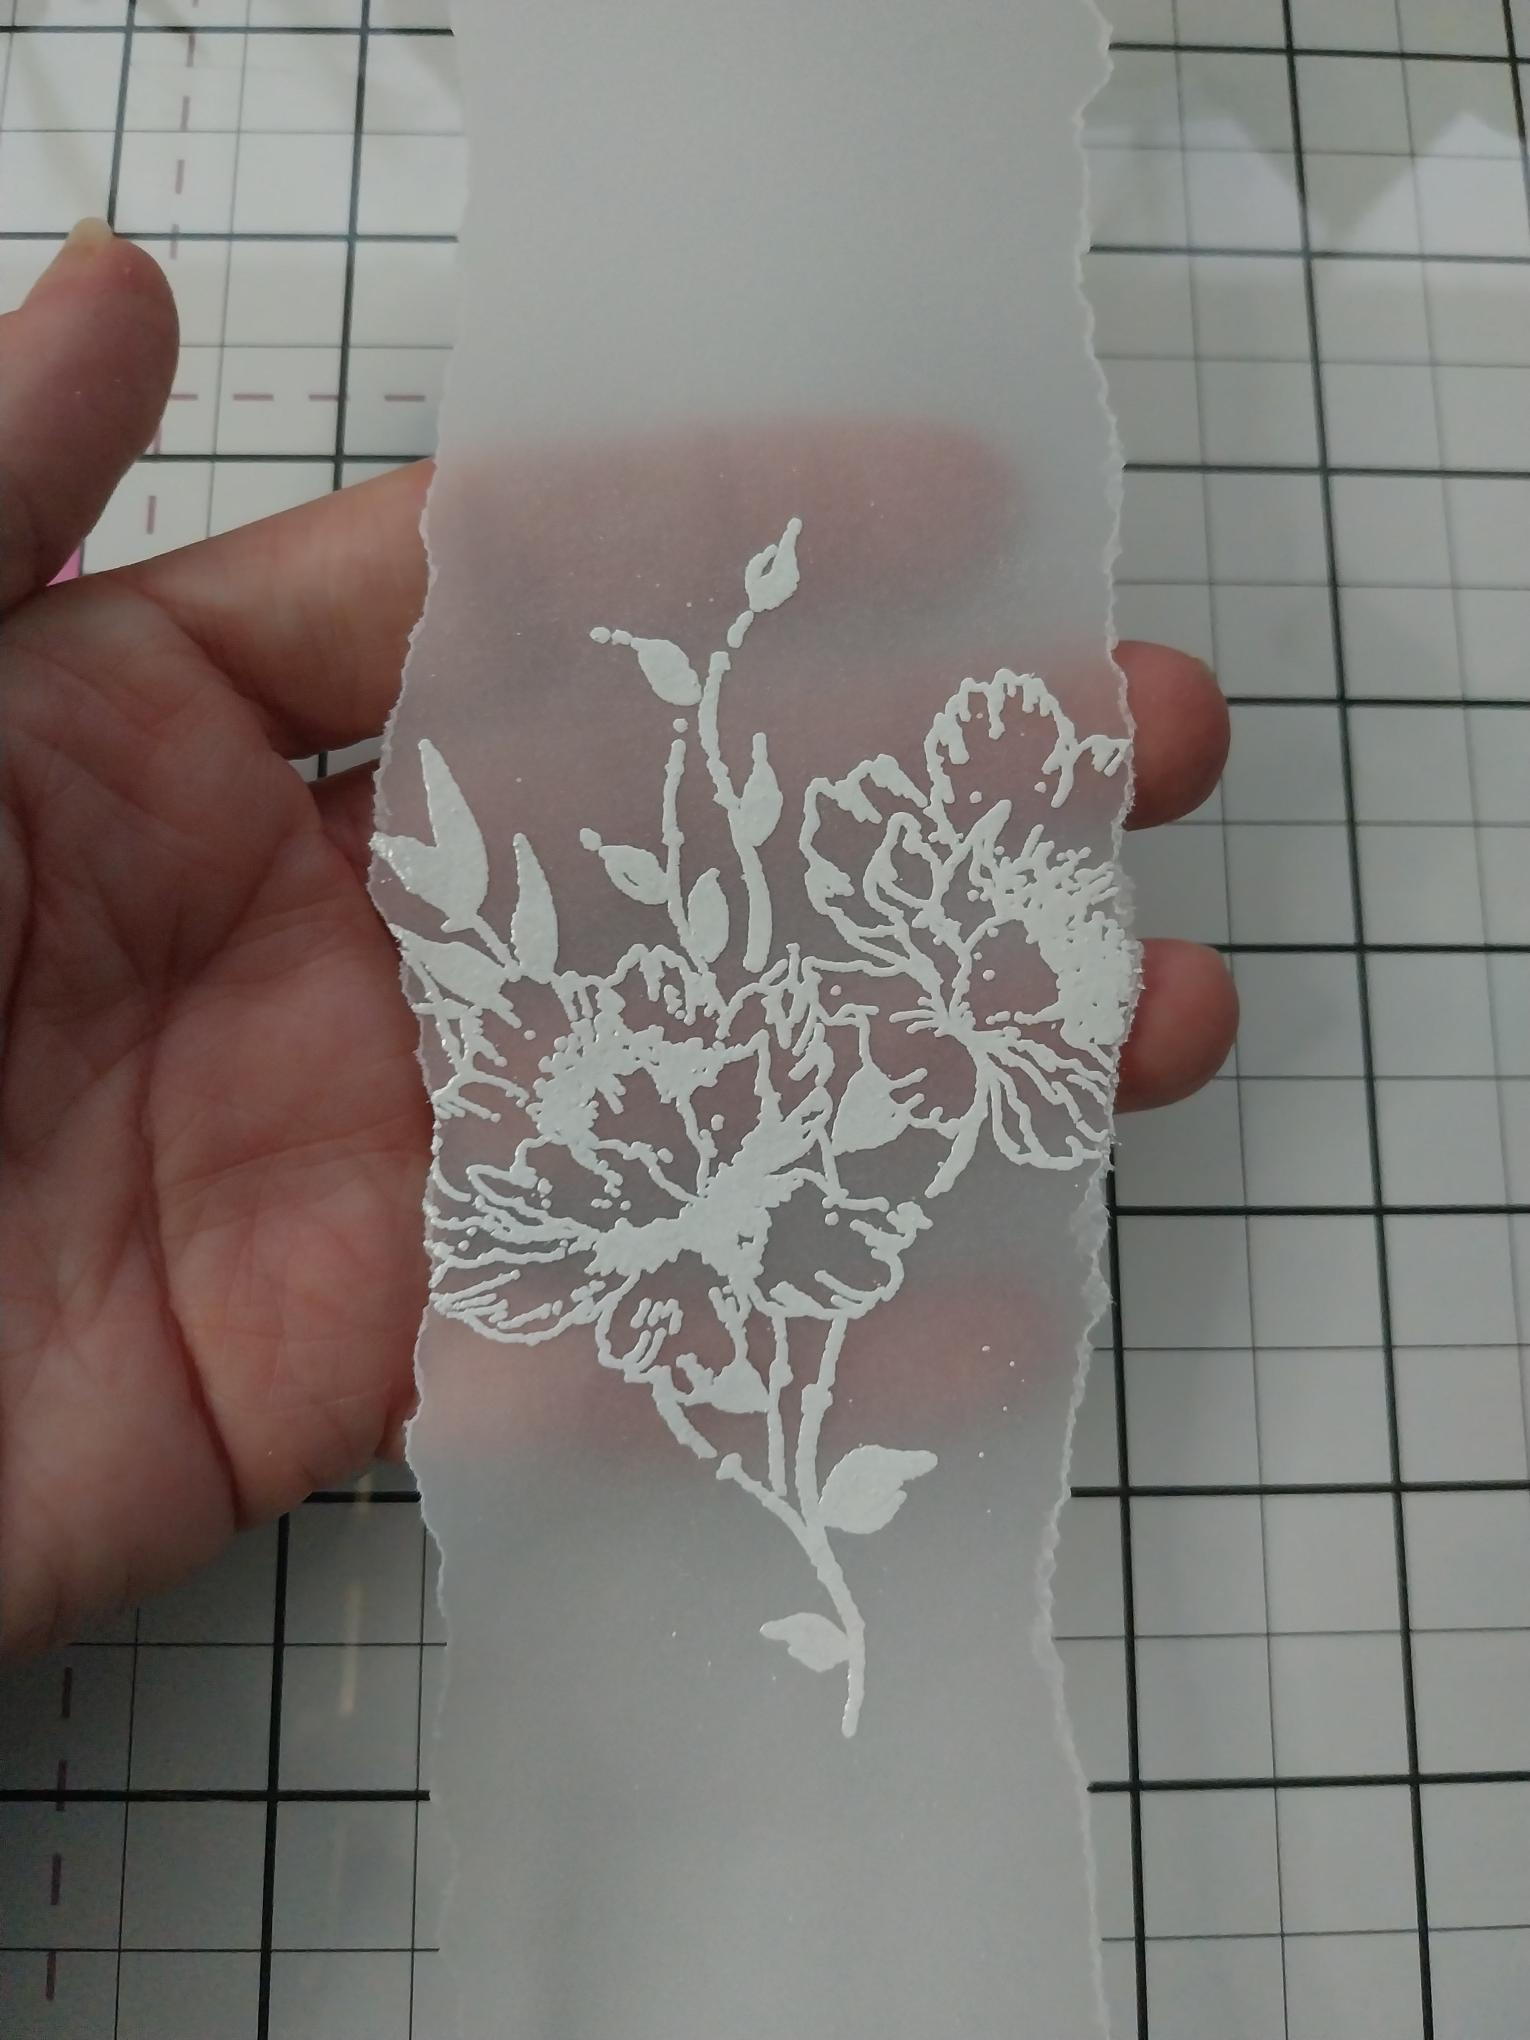
Apply the white embossing powder over the stamped image, shaking off any excess powder and decanting it back in the pot. Get your heat tool hot before heat setting the powder. |
|
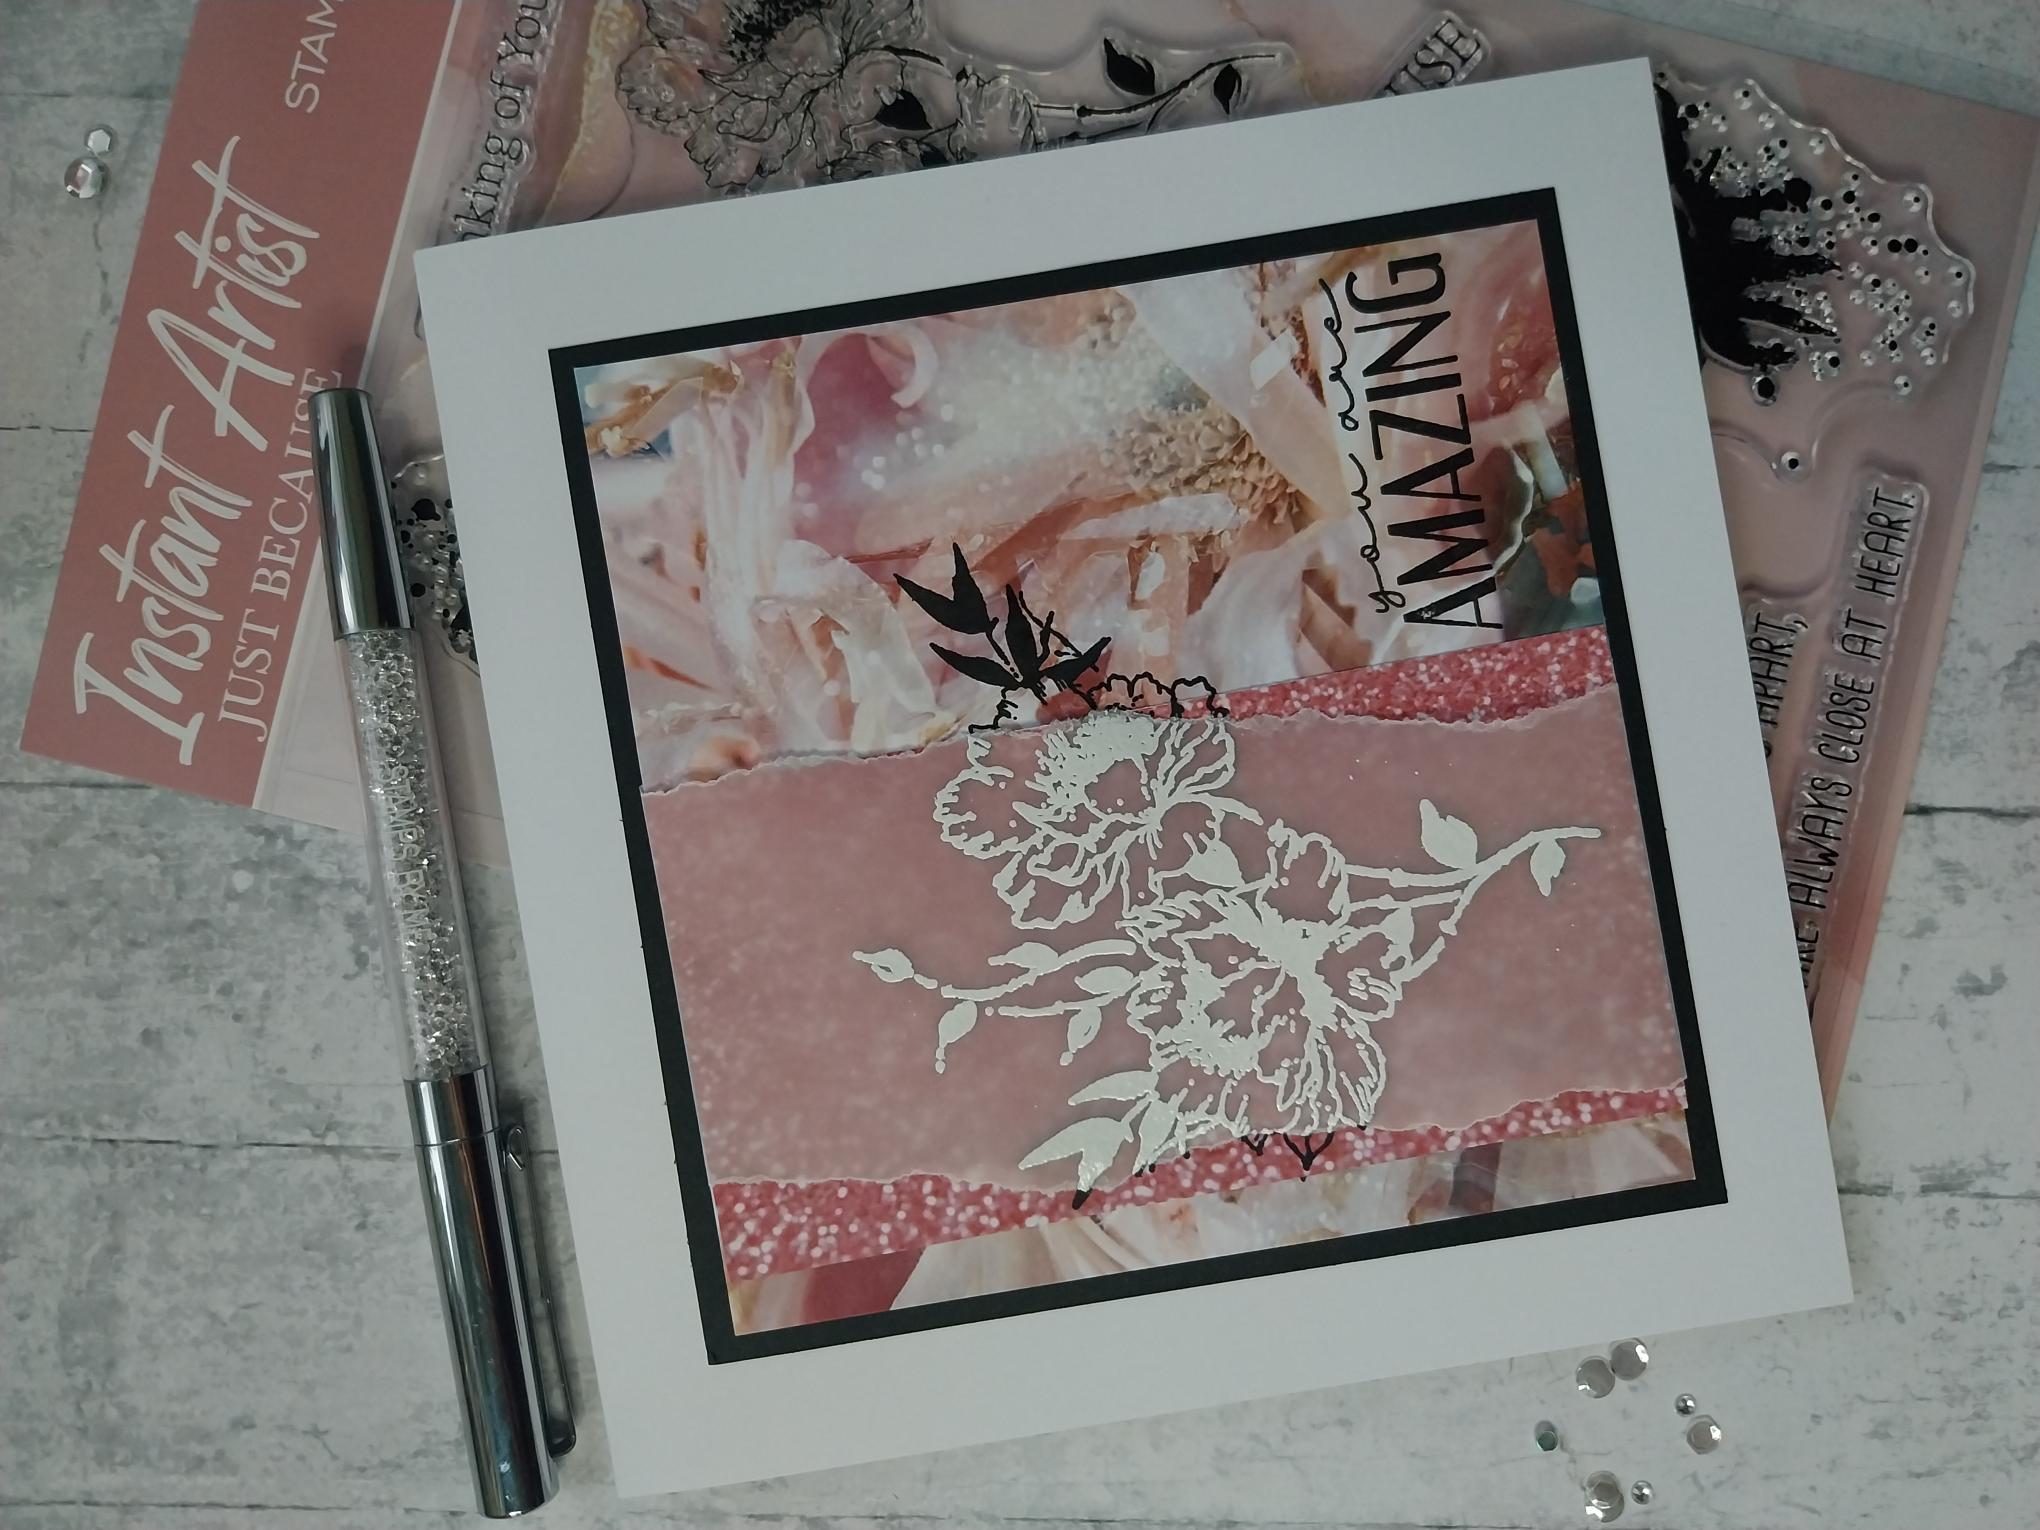
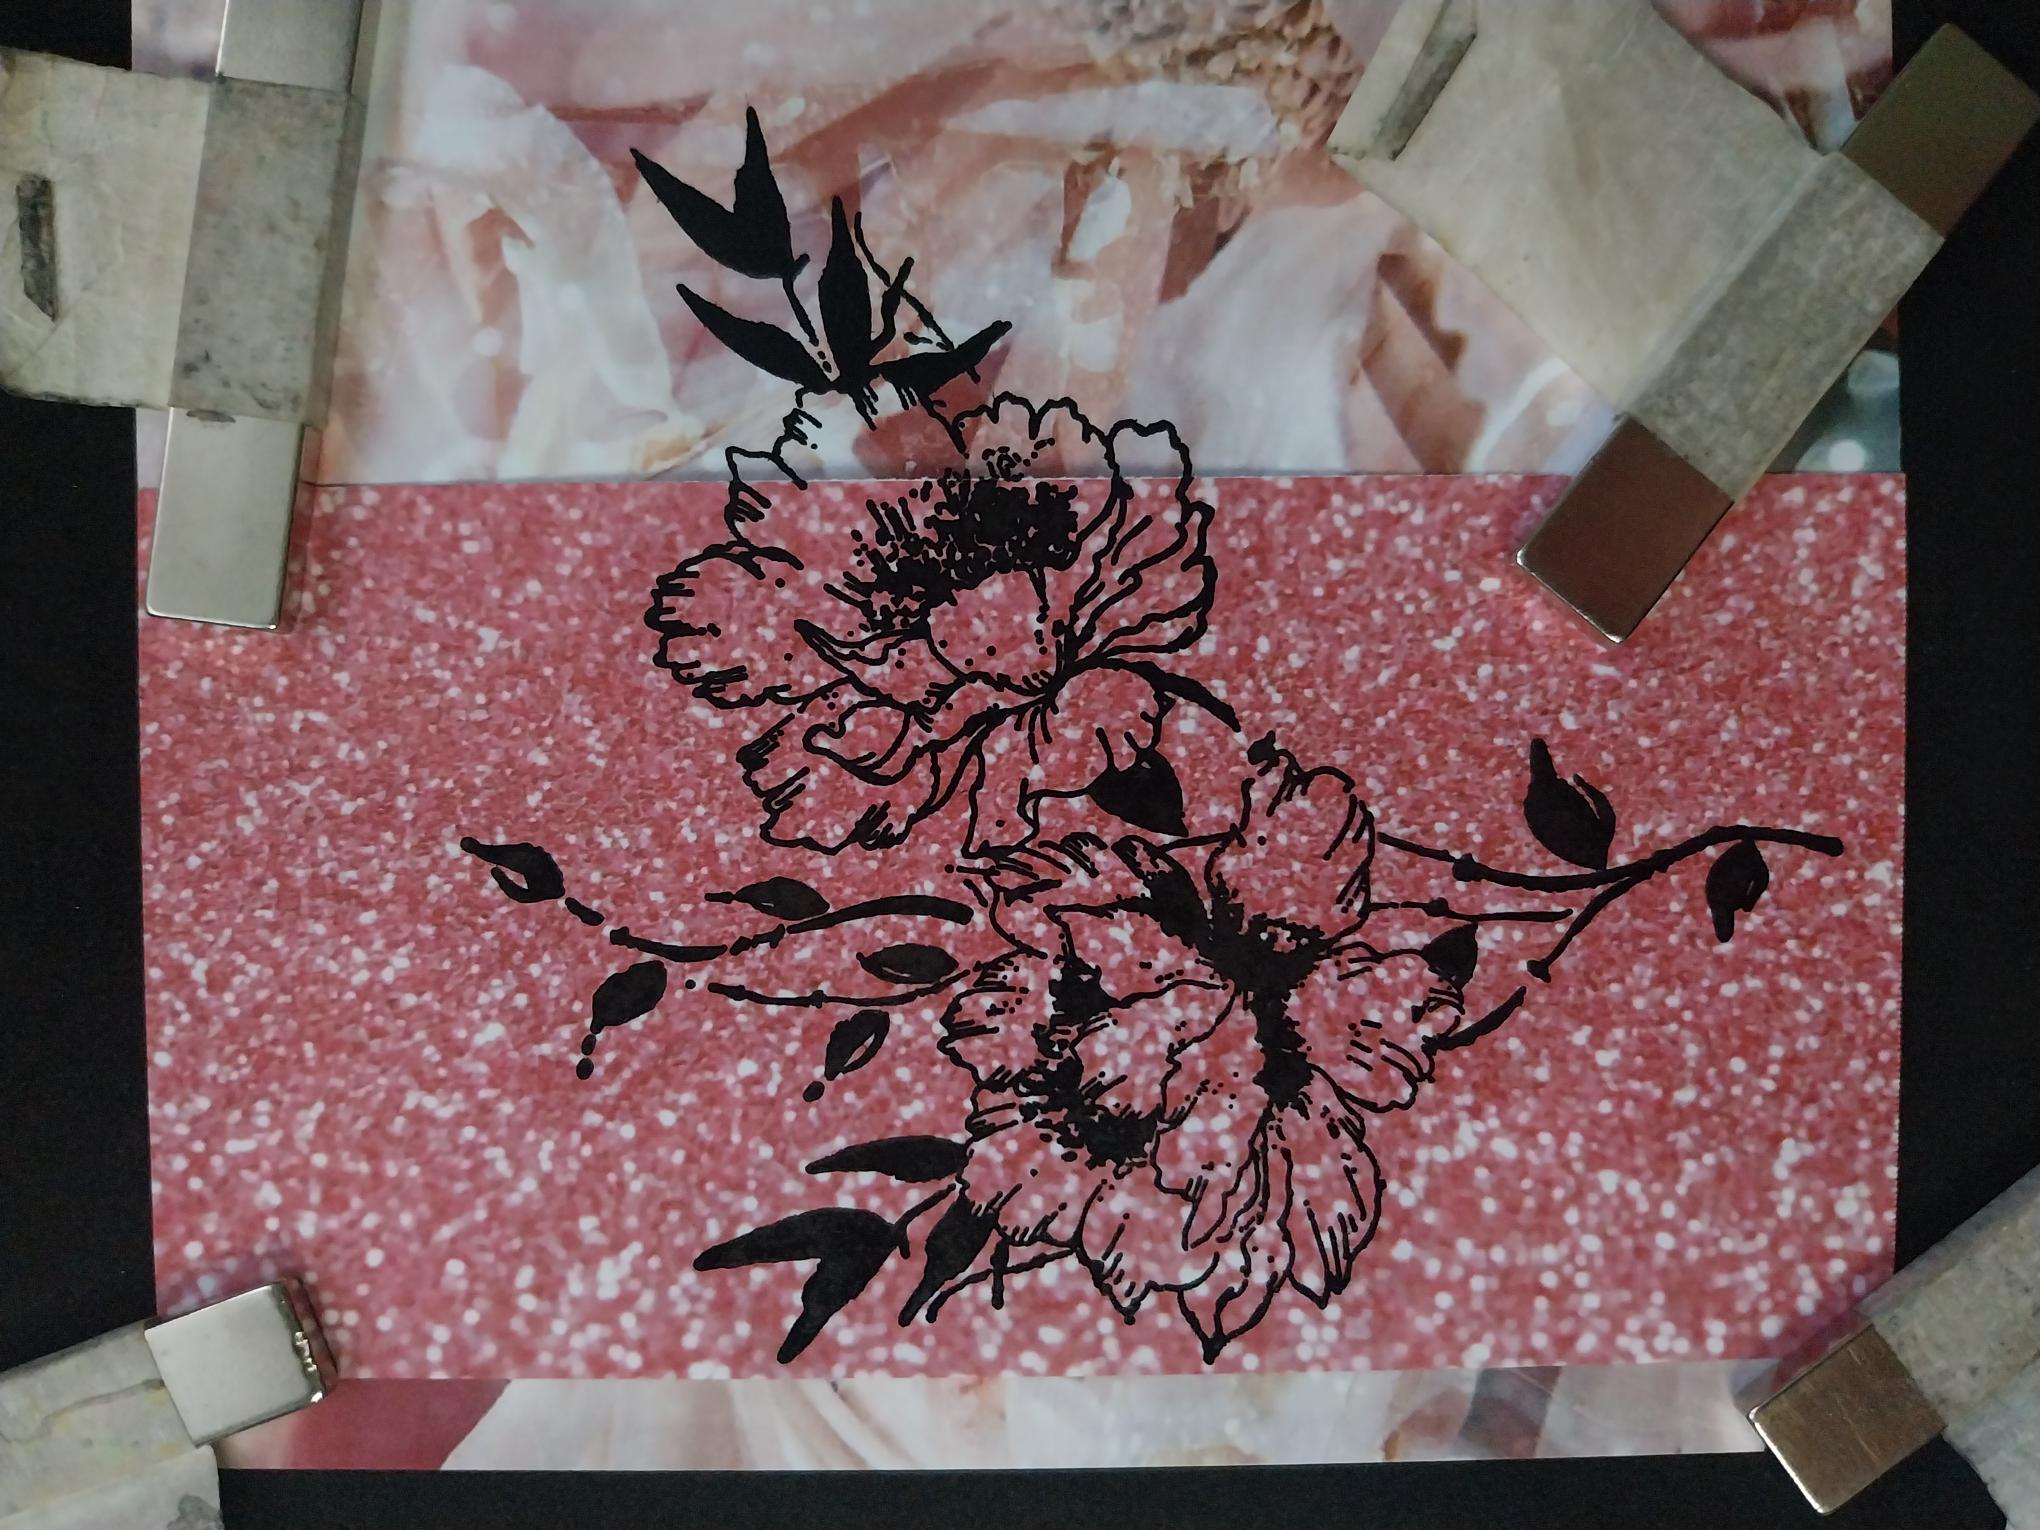
Adhere the stamped paper panel onto the stamped painted mount, ensuring you line up the stamped design. |
|
Place the vellum panel on top of paper panel, lining up the design. Tuck the ends of the vellum over the top and bottom edges and secure on the reverse with your double-sided tape. |
|
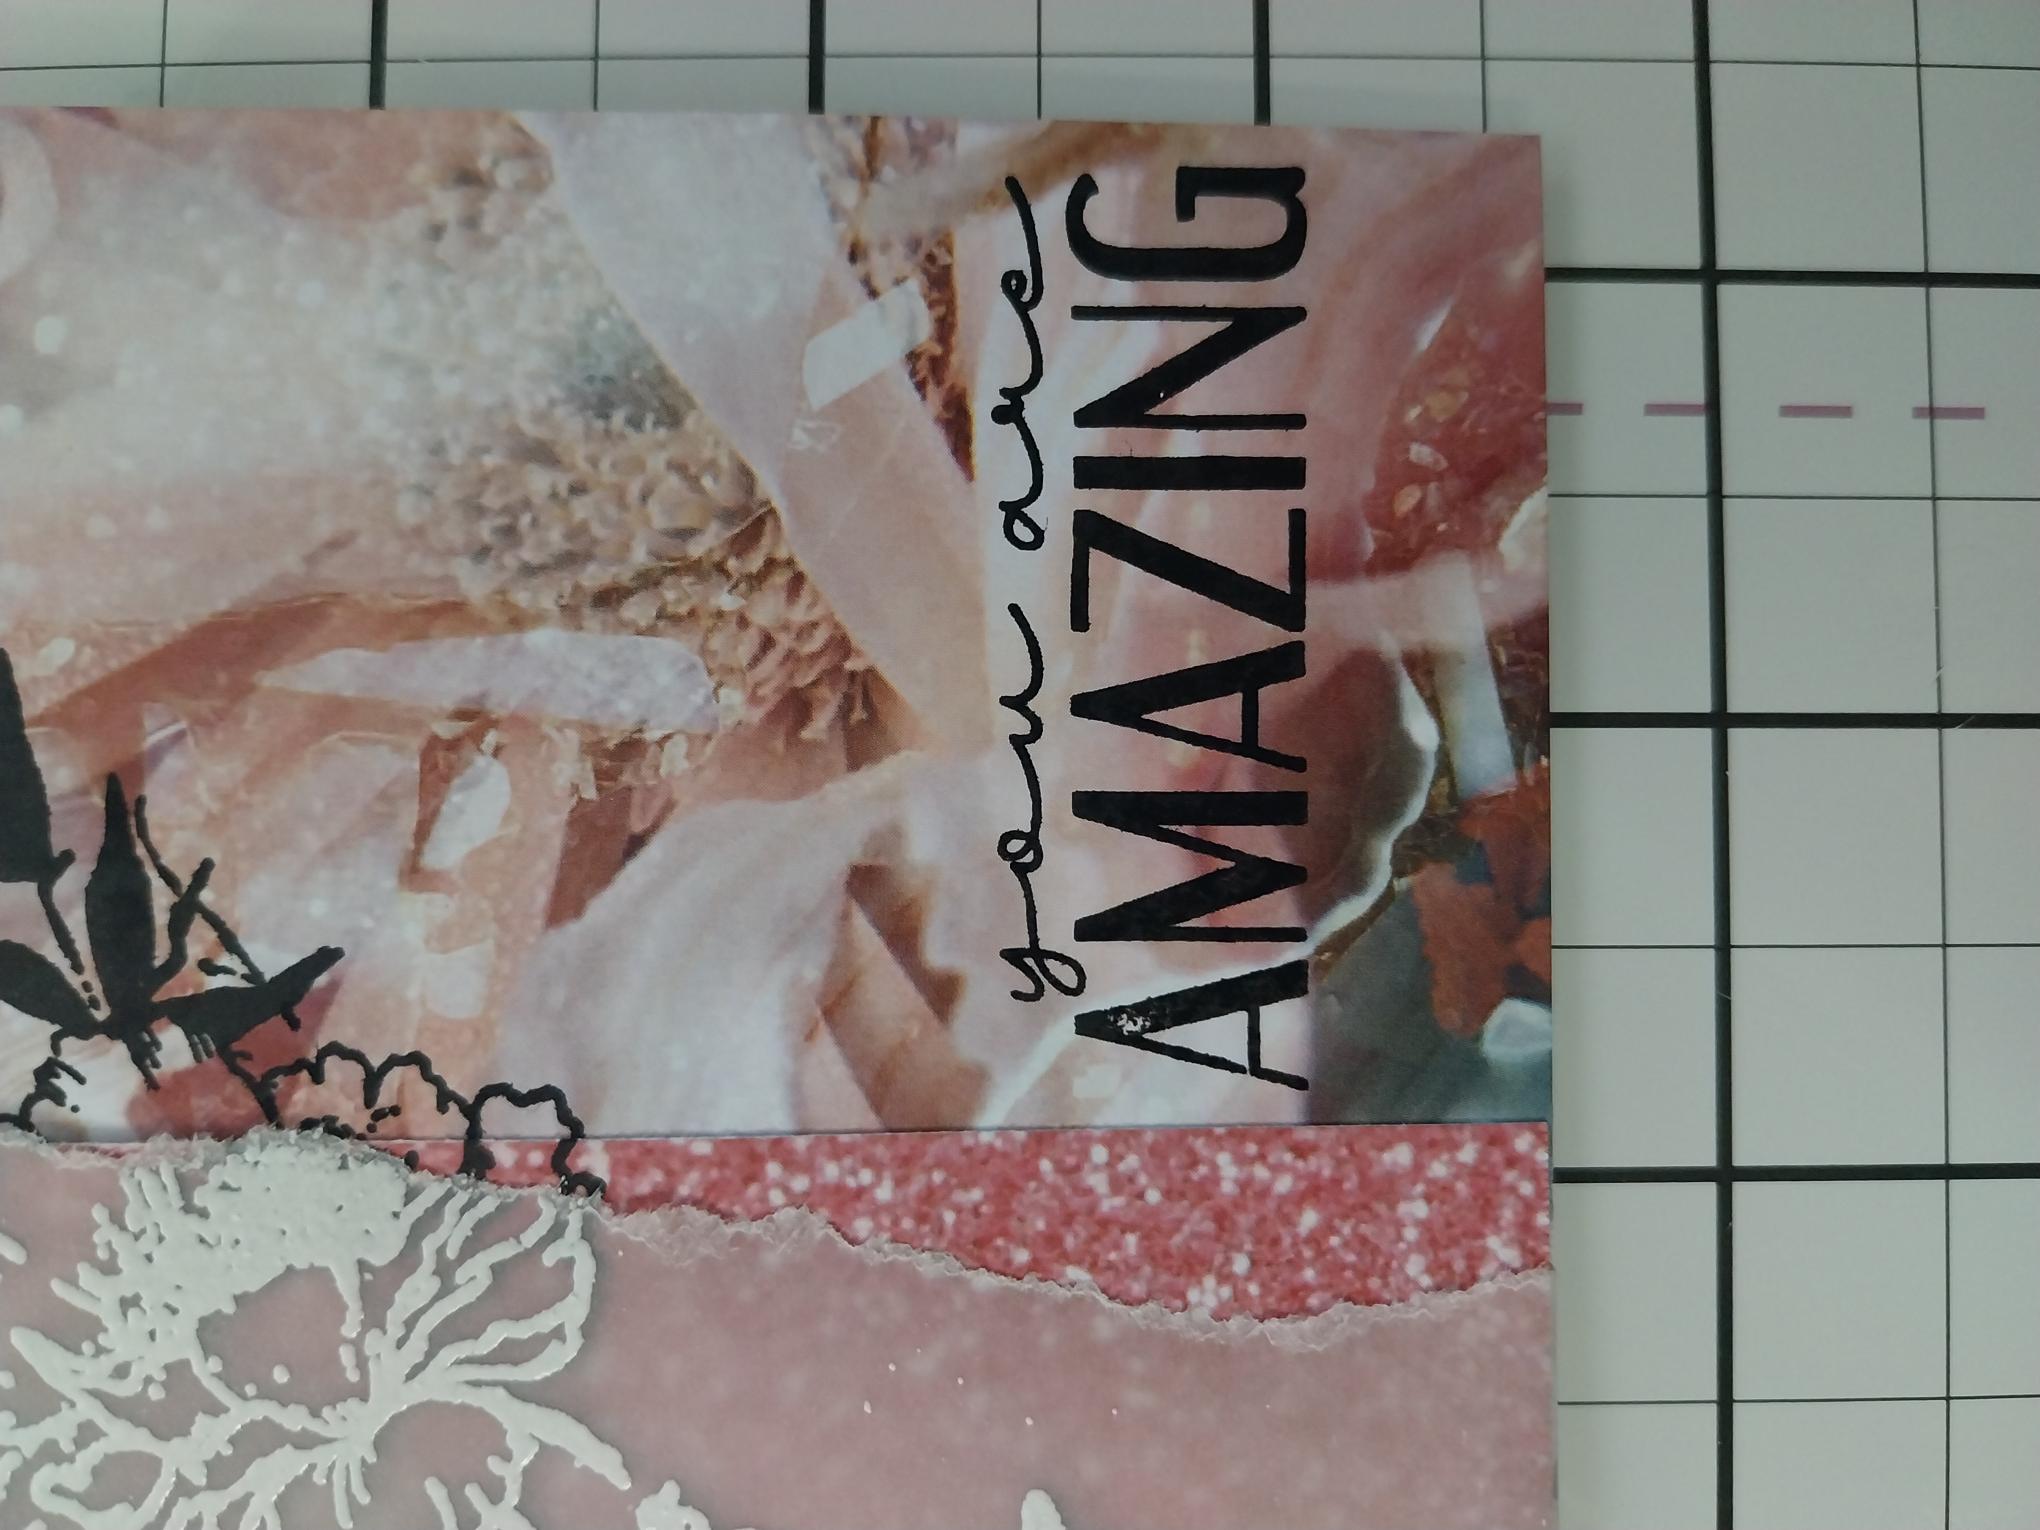
Stamp your sentiment in Midnight, in the bottom right corner of the painted mount. |
|
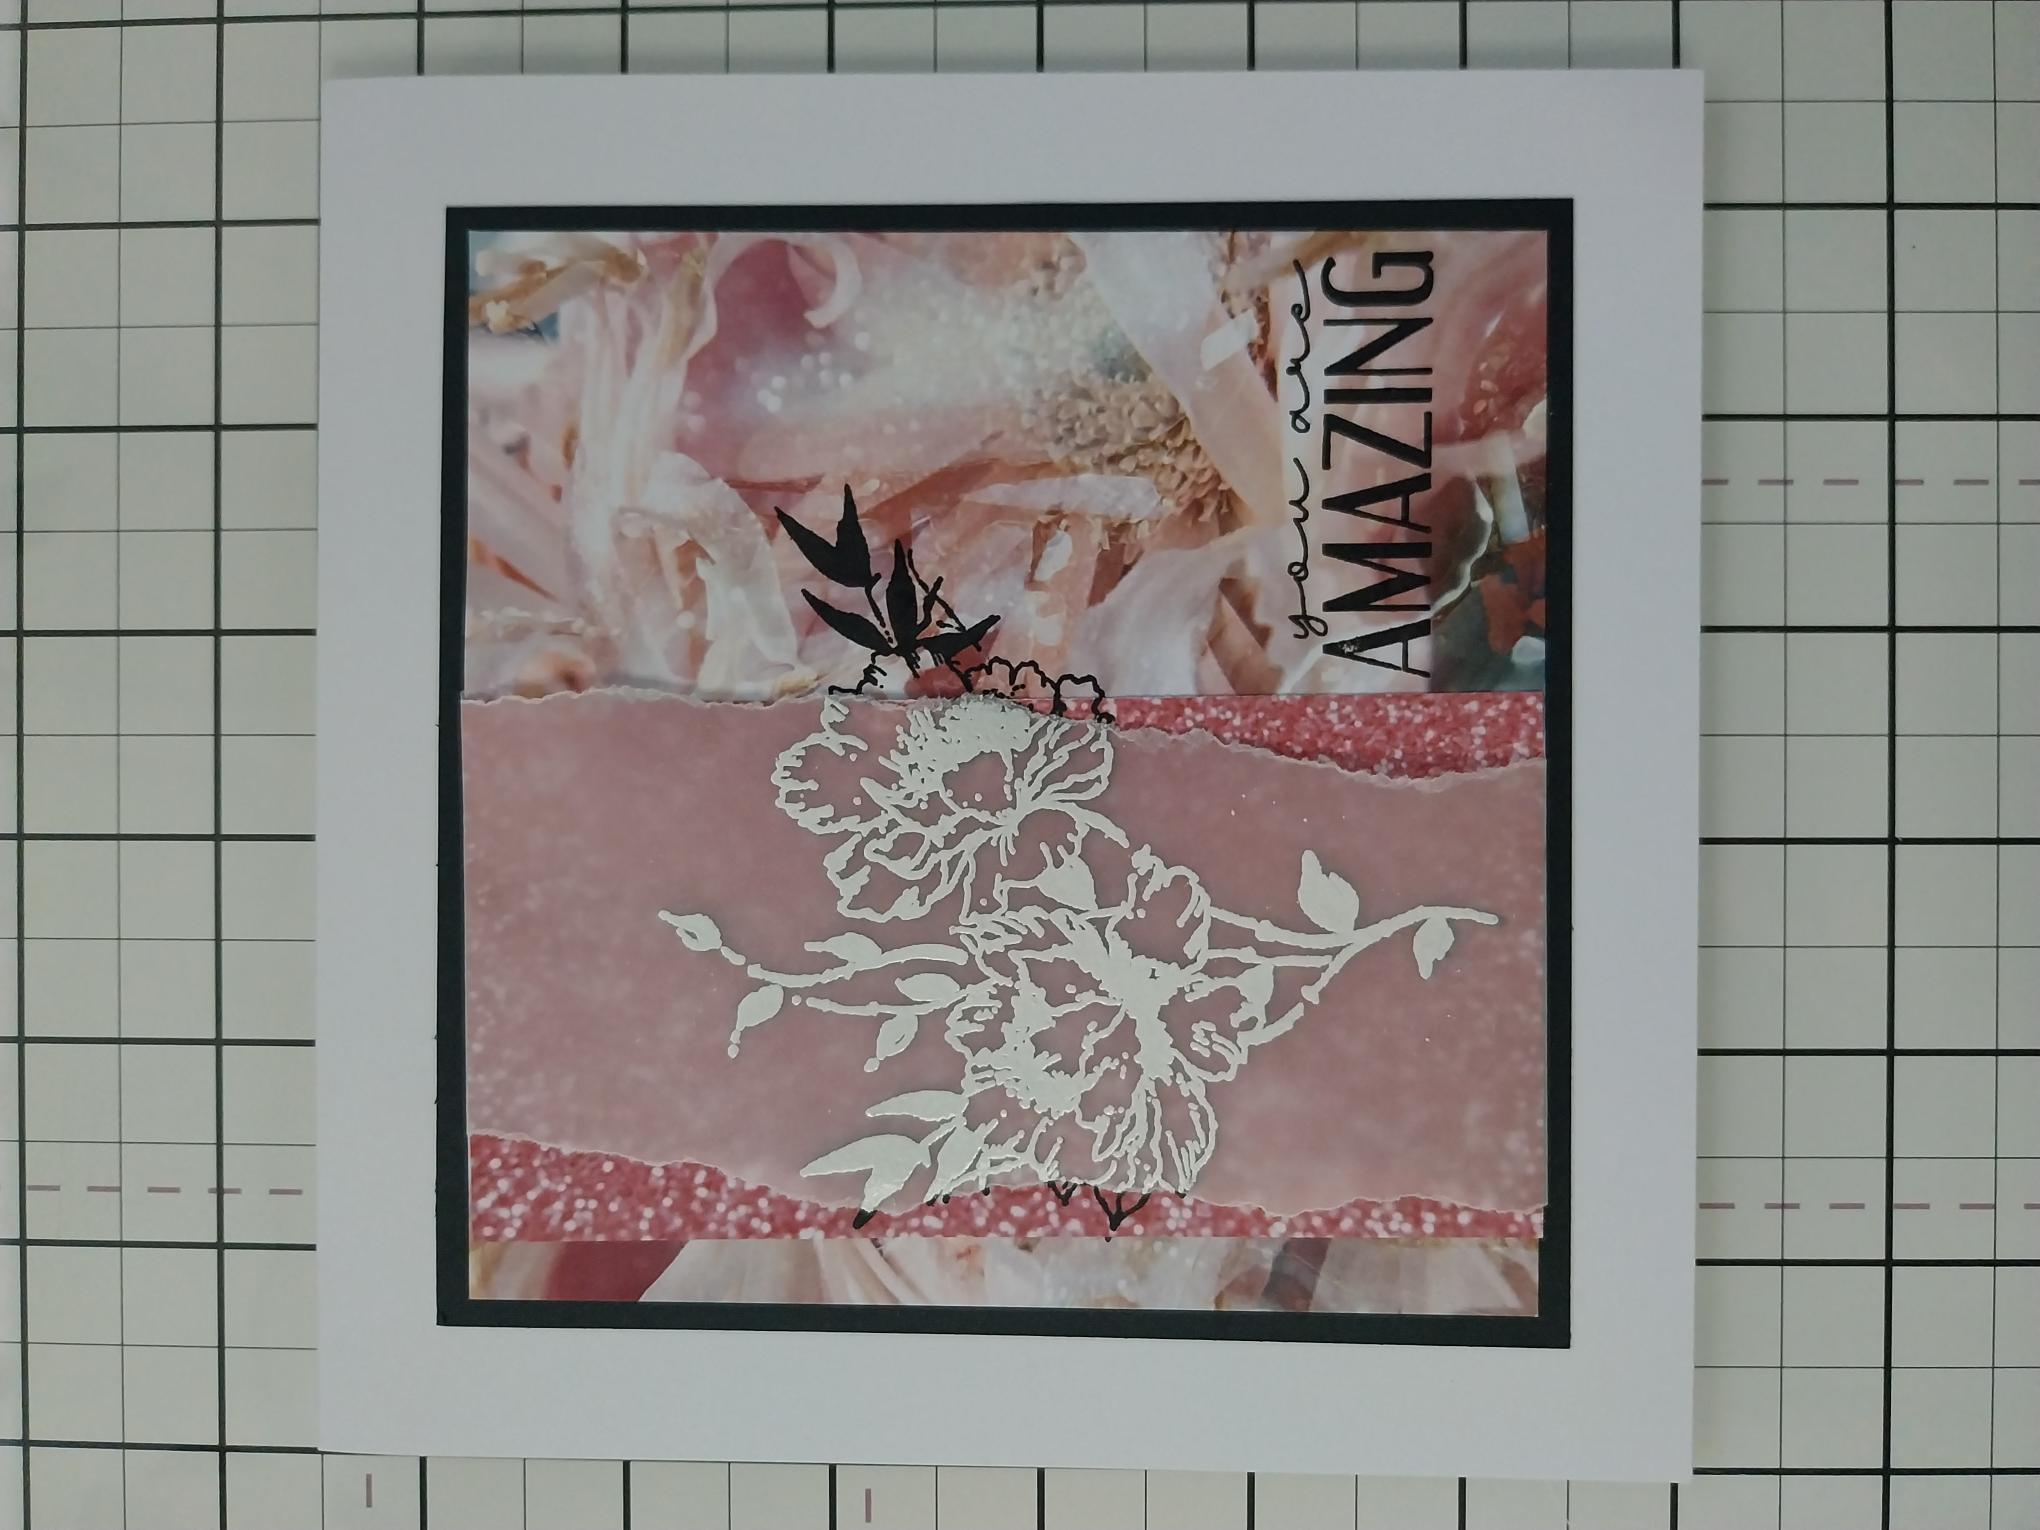
Mat onto black card trimmed to 5 1/4" square and then onto your card blank. |