tap a picture to see it big · tap DONE as you go - this device remembers
Step 1 of 13
Wipe over the vellum with the anti static bag.
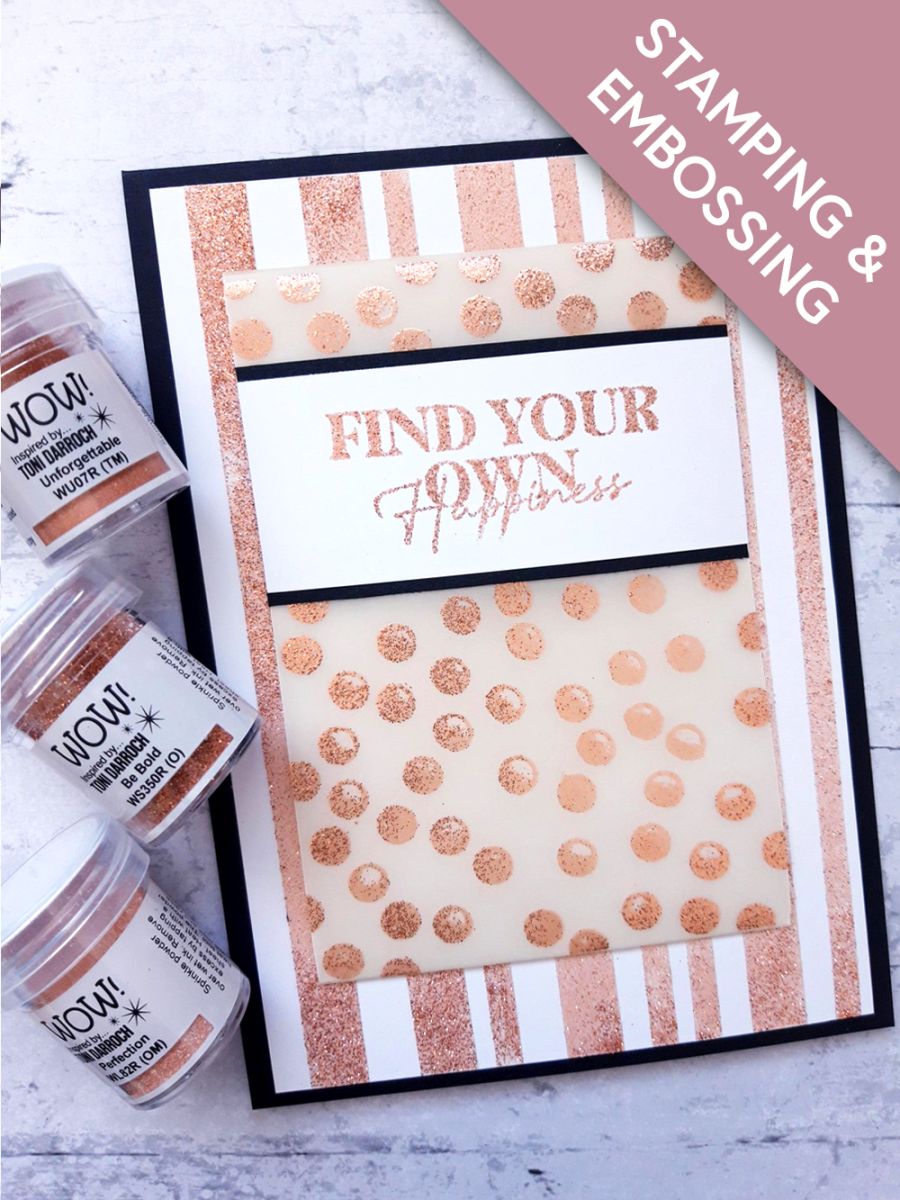
Ink up your Thirsty Brush dots texture stamp, with the WOW Embossing Ink, and stamp on to the vellum.
Apply the Unforgettable, and Be Bold, WOW powders over your stamped image. NB: put any excess powder from the first colour, back in it's own pot BEFORE applying the second colour, to avoid contamination of the powders.
Get the heat gun nice and hot, then heat set the powder, moving the gun as soon as the powder starts to turn, to avoid burning your vellum.
Step 2 of 13
Place the embossed vellum over the white card (5 1/4 x 3 3/4").
Tuck the ends over the top and bottom of the card, and secure on the reverse, with red liner tape.
Pop this to one side.
Step 3 of 13
Place the white card (6 3/4 x 4 3/4") on to your glass mat.
Use red liner tape to create randomly spaced, vertical stripes down your cardstock. (Don't worry about going over the ends of the card).
Step 4 of 13
Carefully trim off all the tape overhanging the top, and bottom, of your card.
Step 5 of 13
Wipe all over your cardstock, with your anti static bag, whilst the tape backing is still in place.
Step 6 of 13
Peel off all the backing, from your red liner tape, being careful not to leave too many fingerprints on the card!
Sprinkle the Perfection WOW powder over random areas of the sticky tape.
Pop any excess powder back in it's pot.
Step 7 of 13
Sprinkle the Unforgettable WOW powder randomly, over some of the areas of the uncovered tape.
Pop any excess powder back in it's pot.
Step 8 of 13
Now apply the Be Bold WOW powder all over your background, so it fills in any of the gaps.
Pop the excess powder back in it's pot.
Get the WOW heat tool nice and hot, before heat setting all the powder.
Step 9 of 13
Adhere your embossed background on to the front of your top folding, black card blank.
Step 10 of 13
Adhere your embossed dots panel on to the centre of your card. You can use wet glue,or foam pads for added dimension.
Set this to one side.
Step 11 of 13
Wipe the anti static bag over the white card (1 1/2 x 3 3/4").
Ink up your sentiment stamp, from the Beautiful Soul Stamp Collection, with the WOW Embossing ink.
Stamp on to the white card.
Apply the Be Bold WOW powder over the stamped image.
Get your gun nice and hot then heat set your powder.
Step 12 of 13
Adhere your embossed sentiment on to the black card (1 3/4 x 3 3/4"), so the left and right sides are flush, and there is equal black card visible top, and bottom.
Step 13 of 13
To finish adhere your sentiment across the embossed dots panel, where desired, using wet glue, or foam pads, for more dimension.
You made it!
Share your make with the Stamps By Me community - and keep this guide for next time.
Hello! I'm Toni's AI craft helper - I know the projects from Toni's shows, our guides and everything in the shop. Ask me anything, like "which dies go with this stamp set?" or "what do I need to start ink blending?"
An AI helper (not Toni herself), answering from Toni's shows and our shop - please check the product page before you buy.