tap a picture to see it big · tap DONE as you go - this device remembers
Step 1 of 8
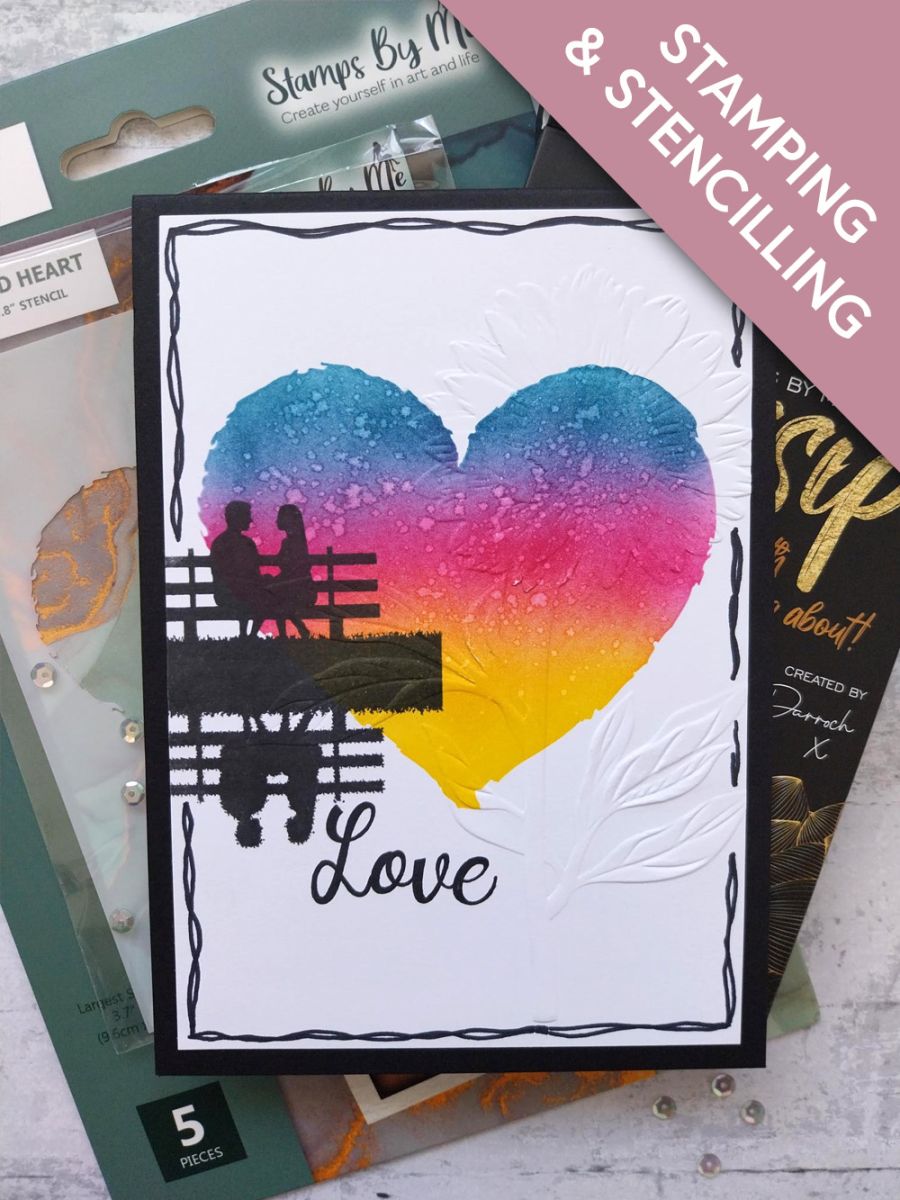
Secure the Stylized heart stencil on top of the white card, centrally but slightly towards the top.
Use your blending tools to apply Sherbet ink across the bottom third of the heart stencil, then Magenta and finally Tiffany at the top.
Step 2 of 8
Swirl the Gossip Gold iridescent glitter pen, to activate the glitter, then squeeze some on to your glass mat. Use a paint brush to add splats within your heart stencil.
Step 3 of 8
Carefully remove your stencil, before drying your artwork with your heat tool.
Step 4 of 8
Ink up our beautiful couple with the Midnight hybrid ink and stamp just off the left side of the card, as seen here.
Step 5 of 8
Once your artwork is dry, place inside your Quattro D Sunflower embossing folder, so it captures the Sunflower down the right side of your artwork. Run through your embossing machine.
Tip: Hang the edge of the folder, where it sits directly down the card, over the edge of the embossing plates. This will prevent a line being imprinted down your card.
Step 6 of 8
Ink up "Love", from Better Together, with the Midnight and stamp just below your stamped image.
Step 7 of 8
Use a black pen to draw a decorative, wiggly frame around your artwork.
Step 8 of 8
Finally, adhere on to your black card blank.
You made it!
Share your make with the Stamps By Me community - and keep this guide for next time.
Hello! I'm Toni's AI craft helper - I know the projects from Toni's shows, our guides and everything in the shop. Ask me anything, like "which dies go with this stamp set?" or "what do I need to start ink blending?"
An AI helper (not Toni herself), answering from Toni's shows and our shop - please check the product page before you buy.