


Step 1 of 12
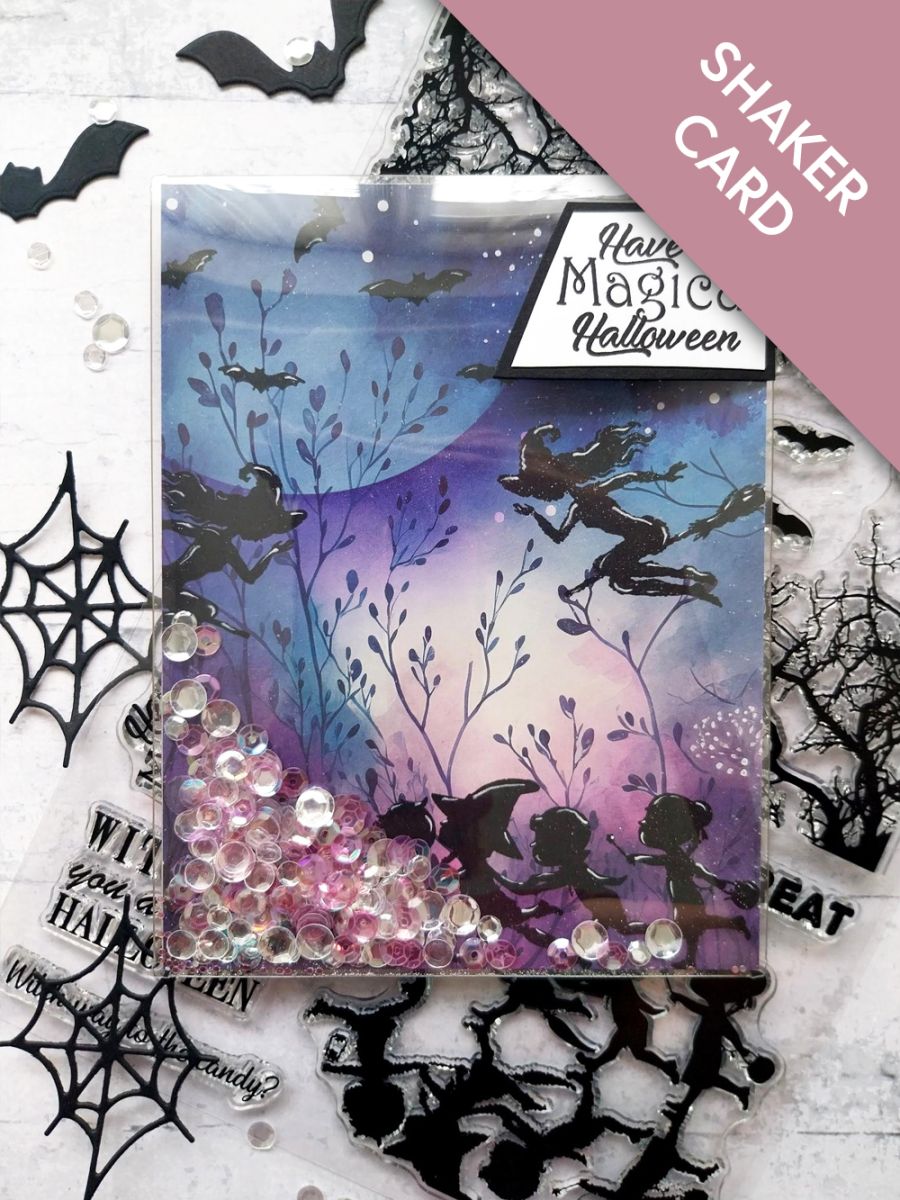
Remove this beautiful decorative paper from the Happy Haunting Collection and trim to 4 1/2 x 5 1/2".








Prices change straight away. Every language is our own translation, not Google.
 Stamps By Me - Premium Dye Ink Pad - IndigoSBM Premium Dye Ink Pad: Indigo
 Blending Tool RectangleBlending tool€11.49BUY✓ ADDED
Remove this beautiful decorative paper from the Happy Haunting Collection and trim to 4 1/2 x 5 1/2".
Place the Moonlight stencil in the top left corner and blend the Indigo ink coming away from the stencil, to create your Moon.
Stamp the bats, from the Trick or Treat set, flying across the Moon, with your Midnight Hybrid ink.
Ink up our enchanting children with the Midnight ink and stamp just the top half of the image, along the bottom of the paper, omitting the "reflective element of the design.
Stamp your bewitching witches flying across the sky, from the Creep It Real set.
Once the Midnight ink is completely dry, use your white Imala gel pen to add accents and highlights to your stamped images.
Remove the protective clear film from your acetate shaker window, before using your bone folder to burnish along the scored lines.
Place your stamped background face down in the acetate window, then peel of the backing tape and seal THREE sides of the window, leaving the top side open, to create a "pocket".
Pour your sequins inside the acetate "pocket", before sealing up the fourth side, to create your shaker element.
Apply red liner tape to the back of your acetate window.
Adhere your shaker to the front of your white card blank, which should be the same size, thus creating an "infinity" shaker card.
Stamp your sentiment on to a piece of white card and trim as desired. Adhere on to a piece of black cardstock and trim to create a "mat".
Adhere to the front of your shaker card with the red liner tape, to finish.
Share your make with the Stamps By Me community - and keep this guide for next time.
Prefer the previous layout? Open the old page.



