tap a picture to see it big · tap DONE as you go - this device remembers
Step 1 of 5
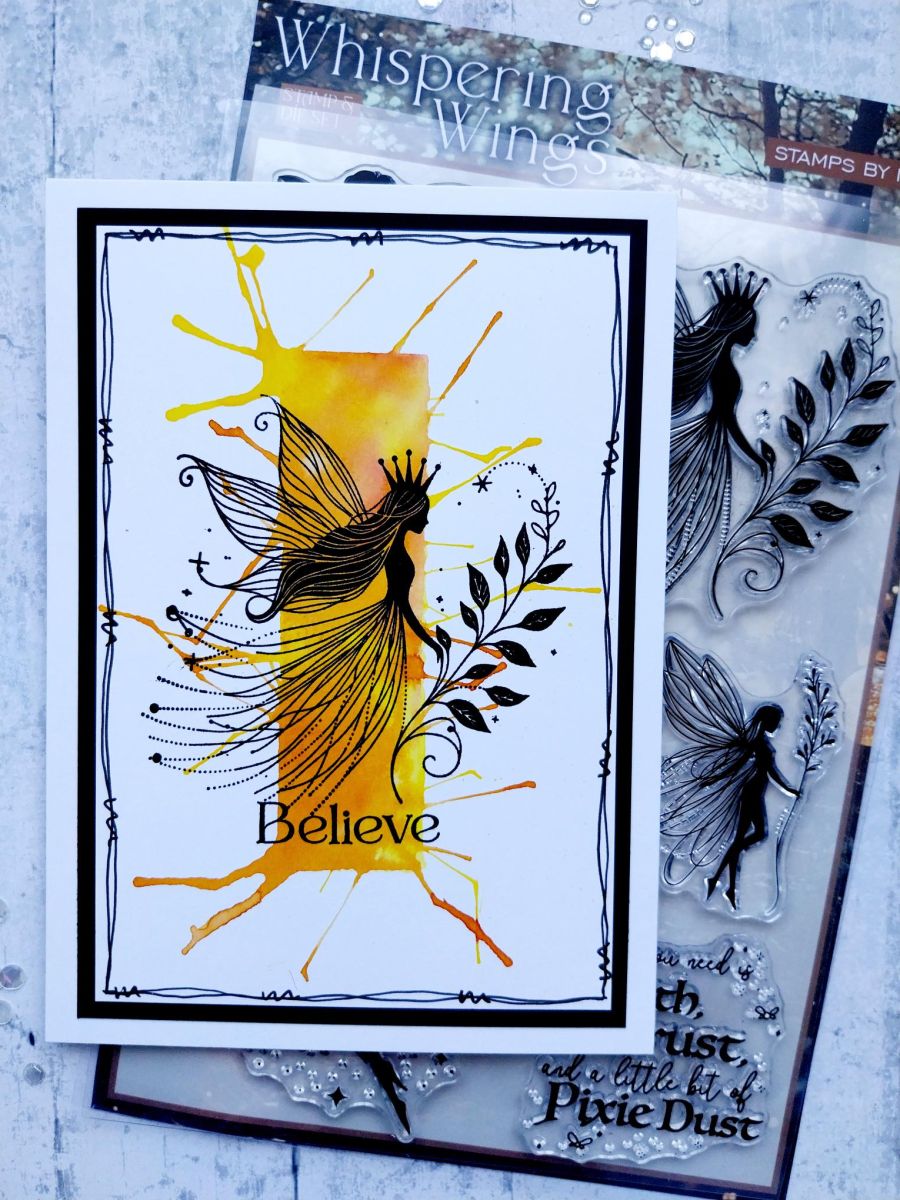
Trim a piece of white card to 4 1/4 x 6 1/4".
Lightly apply the dye inks randomly, onto the acrylic block. Spritz with water then place the block ink-side down in the centre of the white card. Wait a few seconds to allow the card to drink the ink then carefully lift up the block. Whilst the ink is wet/puddled, use your straw or blow tool to blow the ink out from the centre, until you are happy with the effect. If you find the ink is not wet enough to move, reapply ink to the block, spritz and line up on top of the panel, as before.
Step 2 of 5
Once the ink is completely dry, stamp the fairy across the inked panel, with the Midnight ink.
Step 3 of 5
Stamp the sentiment underneath the fairy.
Step 4 of 5
Mat your artwork onto black card cut to 4 1/2 x 6 1/2" and then onto your card blank.
Step 5 of 5
To finish, use a black pen to draw a wiggly frame around the white card.
You made it!
Share your make with the Stamps By Me community - and keep this guide for next time.
Hello! I'm Toni's AI craft helper - I know the projects from Toni's shows, our guides and everything in the shop. Ask me anything, like "which dies go with this stamp set?" or "what do I need to start ink blending?"
An AI helper (not Toni herself), answering from Toni's shows and our shop - please check the product page before you buy.