tap a picture to see it big · tap DONE as you go - this device remembers
Step 1 of 11
Cut the kraft card to 11 1/2 x 16 1/2" and score along the longest side at 5 1/2" and 11". Fold to create your concertina card. (If you do not have A3 card you could adhere two A6 card blanks together to create a concertina card blank).
Step 2 of 11
Choose 4 papers from the Wildflower paper collection, one being your front cover and one will be for your sentiment, so choose one of the paler, less busy designs for this page.
Step 3 of 11
Cut 4 panels of black card, each 7 1/4 x 5 1/4". These will be your "mats".
Step 4 of 11
Use the floral dies to cut a selection of elements from black and white cardstock.
Step 5 of 11
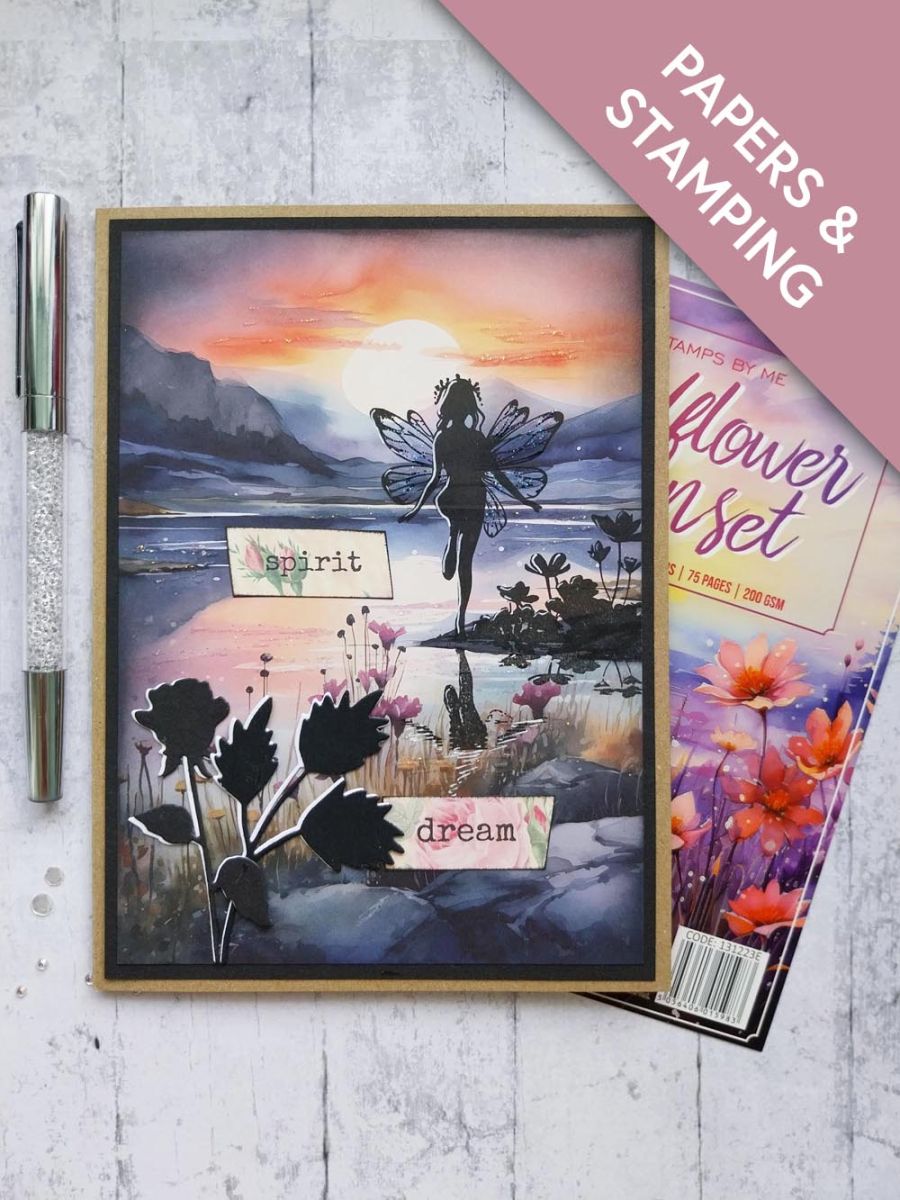
Choose your focal paper that will be used as the front cover of your concertina card.
Stamp the beautiful reflective fairy, in Midnight, on to the decorative paper. Use your white gel pen to add accent and highlights.
Ink around the edges of the paper with the Black Soot Distress ink, to draw your eye in to the focal image.
Step 6 of 11
Adhere one of the white die cuts behind the same die cut in black card but at a different angle, thus creating a drop shadow 3D element. Adhere to the bottom left of the stamped paper.
Step 7 of 11
Cut 2 of the sentiment tabs and swipe around the edges with the Midnight ink pad. Adhere as required.
Step 8 of 11
Mat your stamped paper on to one of the black card mats cut in the earlier step and adhere this to the front page of your concertina card. Pop your card to one side.
Step 9 of 11
Now decorate the other 3 decorative sheets you chose, using the stamps, stencils and dies in the collection.
On one of the papers, stamp your sentiment in Midnight. I emphasised my sentiment by blending the Shaded Lilac Distress Oxide around the oval stencil, drawing the recipients eye in to the sentiment.
Step 10 of 11
Mat your 3 papers on to the remaining 3 black card mats and then adhere to each of the inner pages of your concertina card.
Step 11 of 11
To finish your project, add the Stickles on each of the pages, where required, to add a touch of sparkle and magic!
You made it!
Share your make with the Stamps By Me community - and keep this guide for next time.
Hello! I'm Toni's AI craft helper - I know the projects from Toni's shows, our guides and everything in the shop. Ask me anything, like "which dies go with this stamp set?" or "what do I need to start ink blending?"
An AI helper (not Toni herself), answering from Toni's shows and our shop - please check the product page before you buy.