tap a picture to see it big · tap DONE as you go - this device remembers
Step 1 of 10
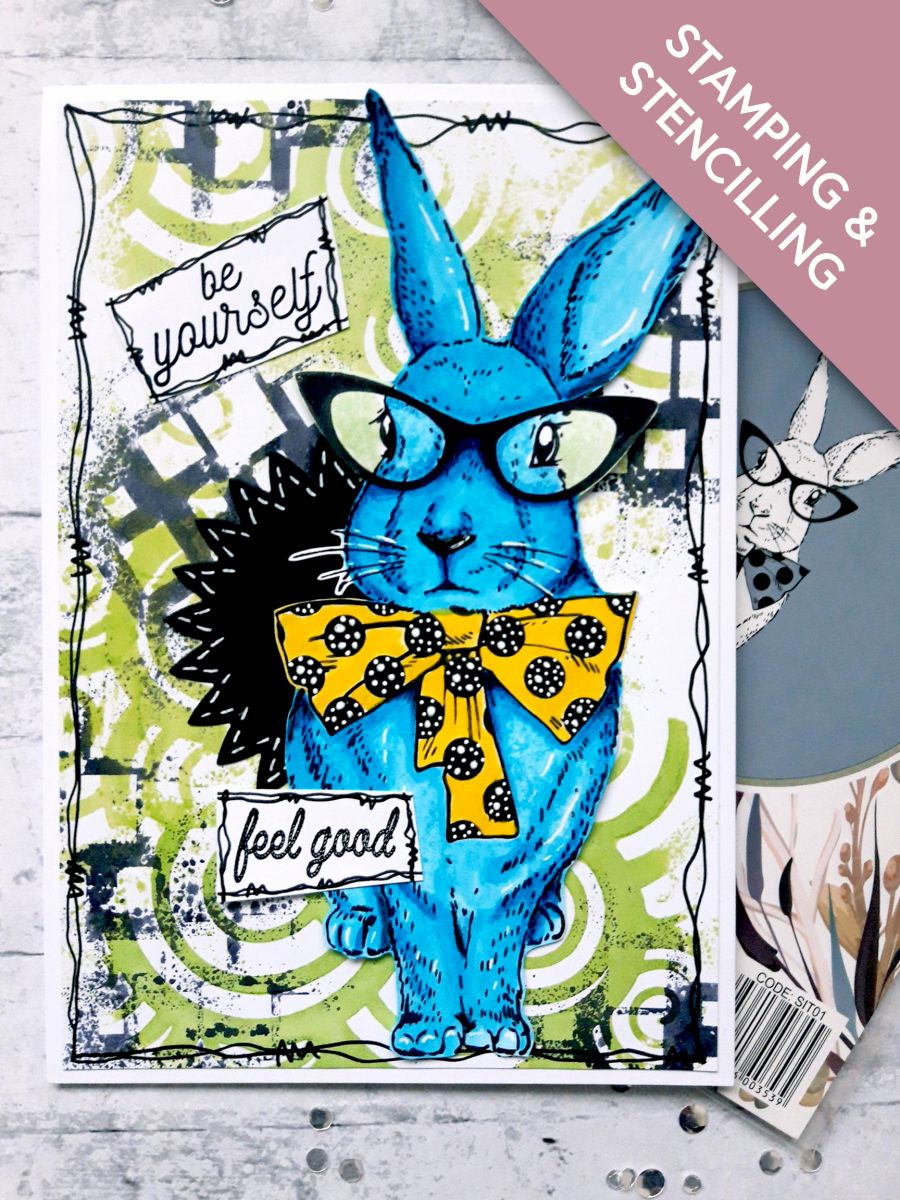
Spray the Izink Vert Anis directly on to the Craft Academy Swirls stencil.
Place random, off the edge, areas of the white card (8 x 5 1/2") on to the sprayed stencil, to lift up a print.
Repeat this by spraying the Izink Black Liquorice on to the squares stencil, and randomly lift off several prints.
Dry off your background.
Step 2 of 10
Draw a decorative, wiggly frame, around your background, with your black pen.
Step 3 of 10
Glue your background on to the front of your top folding, white card blank, and set it to one side.
Step 4 of 10
From the A4 sheet of white card, cut off a piece big enough to stamp your rabbit on to. Set the remainder of the card to one side.
Ink up the rabbit, from Imala Trendy, with the Onyx Black Versafine and stamp on to the white card.
Cut around the delightful Trendy.....soo cute!!
Step 5 of 10
Pop some of the Izink Ultramarine and Mimosa Pigments, on to your craft or glass mat.
Add a little water and paint your rabbit.
Once the Pigments are dry, use the HIMI oil pencils to add shadow and depth to your artwork.
Once all your artwork is dry, use the white gel pen to add accents, highlights, and spots on the bow tie.
Step 6 of 10
In order to help Trendy blend in to my background, I sprayed a little of the Izink Vert Anis on to my mat.
I watered it down, and used my paint brush to lightly blend a little on to the white card areas, on Trendy's glasses. (If preferred, you can wait until you have adhered Trendy on to your background, and then blend the glasses in).
Set Trendy to one side.
Step 7 of 10
Place the star die, from Thirsty Brush UnLtd Build A Bloom Creative Dies, on to the black card (4 x 4").
Run it through your die cutting machine.
Cut your star in half, and use your white gel pen to draw a stitched frame around it.
Step 8 of 10
Having decided where you are going to adhere Trendy first, glue the die cut star in place on your background, so it will sit tucked behind our rabbit.
Adhere Trendy in place, either with wet glue, or foam pads, to add more dimension.
Set card to one side.
Step 9 of 10
Ink up the sentiments from the New Adventures Lamination Stamp Collection, with the Onyx Black Versafine, and stamp on to the white card you set aside earlier.
Cut the words in to strips, and use your black pen to draw decorative, wiggly frames, around both.
Step 10 of 10
To finish your card, adhere the sentiments where required, using either wet glue, or foam pads.
You made it!
Share your make with the Stamps By Me community - and keep this guide for next time.
Hello! I'm Toni's AI craft helper - I know the projects from Toni's shows, our guides and everything in the shop. Ask me anything, like "which dies go with this stamp set?" or "what do I need to start ink blending?"
An AI helper (not Toni herself), answering from Toni's shows and our shop - please check the product page before you buy.