QUICK LINKS

info@howtocraftnetwork.com
We just got smarter - shop and watch with the SBM appGET THE APPWatch us live on your smart TVSEE HOWDiscover our dedicated IPTV channel - go to my-telly.comWATCHCollect loyalty points on every orderFIND OUT MORE
Welcome to the How to Craft Network
 
SBM SHOP
FOLLOW US
GIVE YOUR FRIENDS €10 OFF REFER A FRIEND › DISCOVER MY-TELLY.COM › WE JUST GOT SMARTER GET THE APP › AWARD WINNING CHANNEL ON YOUR TV › JOIN THE CLUB FOR SAVINGS ›
 

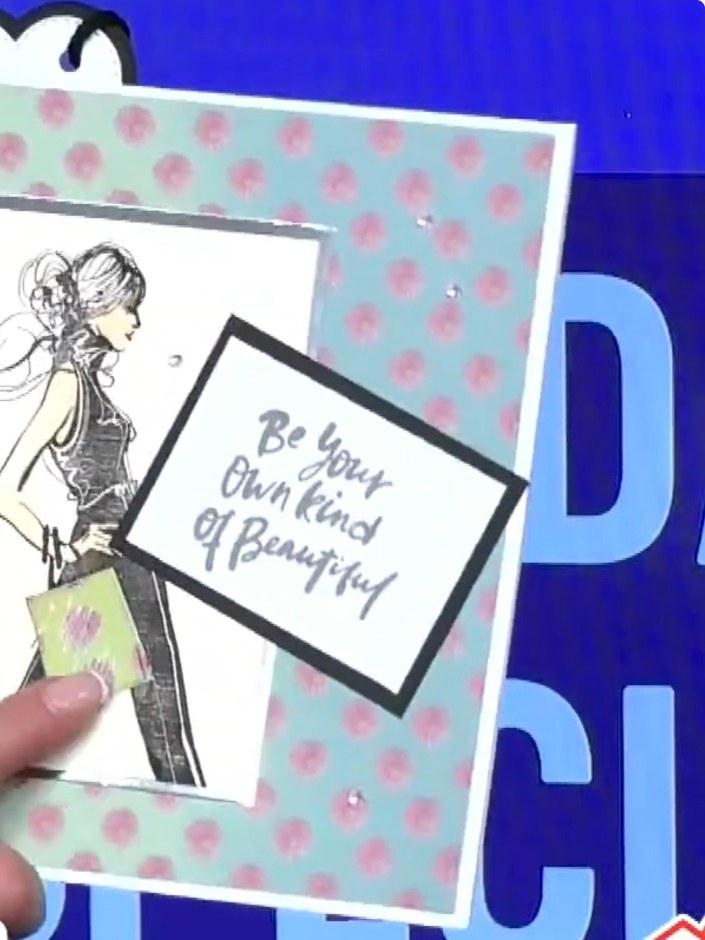
Stay Classy Couple Monochrome Card with Handbag Detail

A project from our live show Create and Craft TV - IMALA LAUNCH - Join Carley Duff - Broadcast 15TH Jan 24 · 15/01/2024 · watch it from 8:30

An elegant monochrome card featuring a sophisticated male and female couple stamp with a handbag element. The design demonstrates how to use a single large stamp set with sentiments to create a versatile card suitable for multiple occasions.
You will need

Imala - A5 Stamp - Stay Classy - 291123HImala - A5 Stamp - Stay Classy - 291123HSEE IT

DOWNLOAD THIS GUIDE (PDF)

Step by step

  1. Stamp the Stay Classy couple images onto white card stock using black ink. The stamp features a male and female figure in elegant poses. ▶ watch 8:45
  2. Stamp the handbag element from the Stay Classy stamp set onto your design, positioning it to complement the figures. You can stamp it separately or as part of the main image composition. ▶ watch 9:00
  3. Add one of the sentiment stamps to your card. Choose from 'Treat Yourself', 'Stay Classy', 'Sometimes Less is More', or 'Better Together'. Position the sentiment as desired on your card design. ▶ watch 9:15
  4. Add colourful patterned or watercolour paper panels behind the stamped image to create a vibrant background. Layer the papers at different angles to add visual interest and depth to your card design. ▶ watch 9:30
  5. Paper piece the handbag by stamping it onto decorative paper, cutting it out, and layering it over the corresponding area on the main stamped image. This adds dimension and visual interest to the design. ▶ watch 9:45
  6. Step 6: Mount the finished stamped design onto your card base. Add a decorative frame or border if desired to complete

    Mount the finished stamped design onto your card base. Add a decorative frame or border if desired to complete the card.

    ▶ watch this step (10:15)

Tips from the show

More from this show

Written up from the show itself. See every guide from our shows · free how-to guides · watch live on My Telly







